
25th February 2026
Pipe flashing is a vital part of well-functioning, waterproof roofing. When damaged, it is often a major source of leaks, so it’s crucial that it’s installed properly.
But how do you flash a pipe? Whether you’re looking to replace yours or working with a newly built roof, you’ll want to know how to install pipe flashing. That’s why at Roofing Superstore, we decided to put together this extensive guide.
Table of contents:
- What you’ll need
- How do you install flue flashing on a roof?
- How do you install vent pipe flashing on a metal roof?
- How to install pipe flashing with confidence
What you’ll need

Installing pipe roof flashing is a simple enough DIY in most cases, and you’ll only need a handful of tools and materials to carry it out.
First and foremost, you’ll need new flashing. But not just any new flashing. The one you get should be the right size and also suitable for use with your roof pitch. To find out more, check out our ‘Pipe flashing buyer’s guide’.
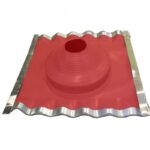
In addition, with traditional fixed lead slate flashing, you need to make sure you have the correct diameter for your pipe – otherwise, it simply won’t fit.
With flexible lead slates, which have been gaining in popularity in recent years, you won’t have to worry about that. If you get one of these, you’ll notice a series of concentric rings on the rubber piece, which represent standard pipe diameter options.
Apart from new flashing, you’ll need:
- Ladder
- Roof nails
- Hammer
- Utility knife
- Pry bar
- Roof sealant (if you have roof shingles)
- Diamond blade (if you have roof tiles)
How do you install flue flashing on a roof?
Once you’ve assembled everything, it’s time to get to work! To minimise the risk of injury, choose a dry, calm day without sudden gusts of wind and follow these steps:
Step 1: Remove the old flashing
If you’re working with a brand-new roof, simply move on to the next step.
If that’s not the case, you’ll need to remove the old flashing first. To do so, remove the tiles immediately above the flashing. If you have shingles, you’ll need to pry them away with a pry bar, but you don’t have to remove them altogether.
Next:
Remove the nails holding the old flashing in place and slide it up along the pipe to take it out.
Step 2: Place the new flashing into position
If you’re using a flexible lead slate, you’ll have to select the correct diameter ring first.
Now:
Using your utility knife, carefully cut around the desired setting. Then, slide the flashing over the top of the pipe all the way down.
Roofing Superstore pro tip:
Don’t worry if the flashing is a bit difficult to insert at first. The goal is for it to create a weatherproof seal around the ventilation pipe on the roof, after all, so it needs to be tight! To make things easier, you can lubricate the rubber part with a mixture of dishwashing liquid and warm water.
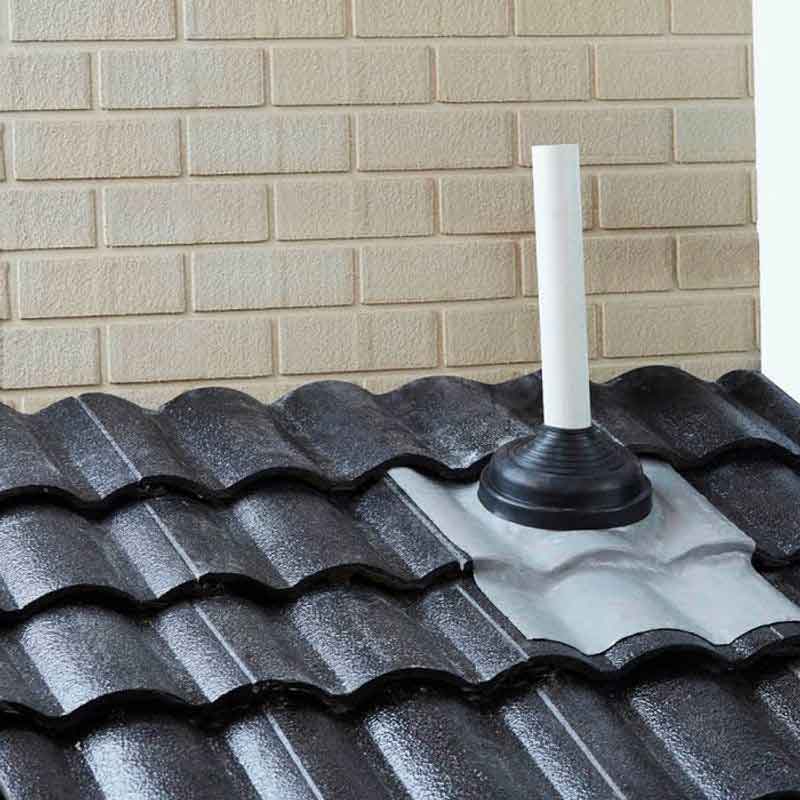
Step 3: Secure the flashing with roofing nails
Once you’ve made sure the flashing is flush with the roof, hammer in the roofing nails.
Start from the top and carefully work your way down. If you’re looking for extra protection, you might want to apply a thin bead of sealant around the base of the flashing, but that’s entirely optional.
Step 4: Put the shingles or tiles back into place
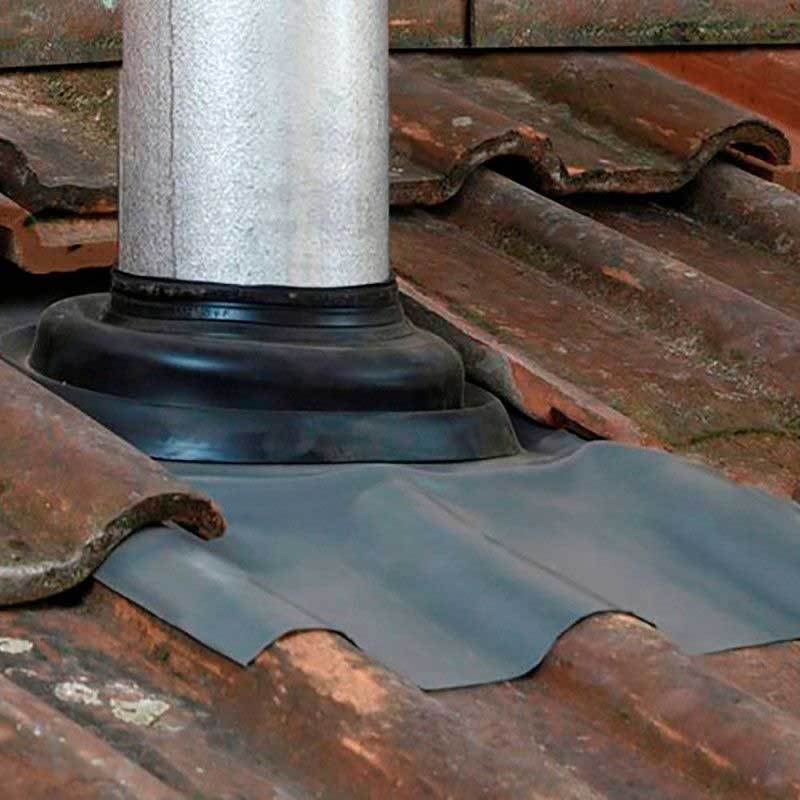
In order to prevent water from getting in, the new roof pipe flashing needs to go underneath the roof coverings on its top side and over those on its bottom side.
If your roof has tiles, you’ll have to replace the ones you removed earlier. If it has shingles, hammer back into place the shingles you pried away.
Either way, always follow the manufacturer’s instructions and ensure that the coverings in question are fitted securely and aren’t loose.
Roofing Superstore pro tip:
If the old coverings are damaged or don’t fit around the pipe neatly, it’s a good idea to cut the shingle or tile in a suitable shape using a utility knife or diamond blade, respectively.
You should do a semi-circular-shaped cutting for a shingle and a rectangular-shaped one for a tile. It needs to be around an inch or so larger than the dimensions of the bottom of the flashing.
Step 5: Test the flashing
As we mentioned earlier, you should only attempt DIY roof work by yourself if it’s not raining.
So, how do you know you’ve installed your new pipe roof flashing correctly?
Simple – with a quick test.
Using low pressure in order to avoid damage, run water from your garden hose around the flashing for a few minutes. After that, grab a torch, go to the loft or attic and examine the areas of the ceiling immediately below and around the flashing.
So long as you don’t see any stains, you can congratulate yourself on a job well done!
How do you install vent pipe flashing on a metal roof?

The process of flashing a vent on a metal roof is quite similar to the one we’ve already described, with a couple of small differences.
In fact, it’s even easier!
On a metal roof, there are no shingles, tiles or any other type of roof coverings for you to remove. You’re also going to use screws instead of roof nails.
So, if like a lot of DIYers out there you were wondering, ‘do you use nails or screws for flashing?’, you now know which one to use depending on your roof.
As for the specific steps:
Step 1: Apply sealant
Apply roofing sealant liberally along the bottom side of the flashing and fit it over the vent pipe on the roof. If the bottom is square, place it in the shape of a diamond, as this will allow rainwater to go down either side more easily.
Step 2: Insert screws
Using a drill, insert the screws at a distance of around 1.5″ from one another.
Step 3: Finish the edges
Finally, apply a thin bead of sealant around the edges of the vented flashing.
Once again, you might want to water-test the flashing, just to be on the safe side.
How to install pipe flashing with confidence
It’s always a good idea to prepare for the rainy season well ahead of time.
This way, come the autumn storms, you won’t have to suddenly wake up to a damaged, leaking roof.
Since pipe roof flashing is essential to a safe and secure roof, you should consider water-testing yours regularly in order to make sure everything is in good working order.
And if that’s not the case:
Well, now that you know just how to install pipe flashing, you’re all set to take on the task by yourself without any difficulties.

Was this guide useful?
Mentioned in this project guide:


