
Chimney cowls and caps are protective coverings designed to be placed on the top of a chimney.
Their main function is to prevent wind from causing smoke to flow back into your home, while also safeguarding your chimney against birds, debris and pests.
Capping a chimney might seem like something of an afterthought. But it can play a huge role in protecting your chimney from a number of common issues and prolonging its service life.
Read on to find out more about the benefits of chimney capping, the different chimney caps available and how to cap a chimney.
Table of contents:
- What is capping a chimney?
- Why cap off a chimney
- Which chimney cap do I need?
- Chimney caps vs balloons – what’s the difference?
- How to cap a chimney
- Final thoughts
What is capping a chimney?
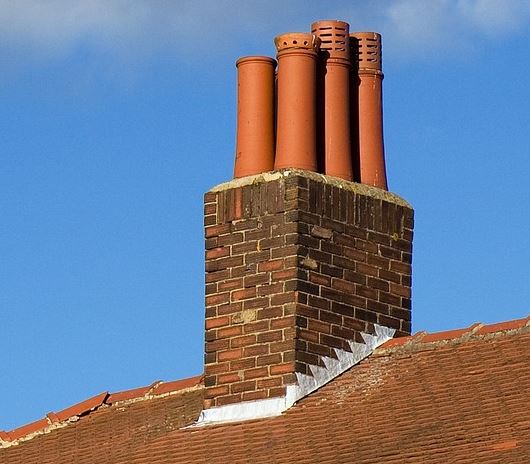
Capping a chimney involves the installation of a covering on the top of a chimney, blocking the chimney opening. There are a number of different options available when capping a chimney, depending on whether the chimney is in use or not.
Why cap off a chimney?
There are a number of benefits to capping off a chimney because the chimney acts as a point of entry into the home or building.
 Prevent moisture ingress
An open chimney on a roof acts as a potential entry point for rainwater, moisture and more. Water and moisture can cause structural damage to the building, as well as the chimney. Additionally, moisture can enter the rooms via the chimney and fireplace, leading to dampness and mould forming. Capping the chimney will prevent any rainwater from entering the chimney space and causing issues related to dampness and moisture.
 Stop downdraughts
Downdraughts can affect the performance of your fire, because the wind blows back down the chimney, instead of drawing smoke out of the chimney, which reduces the efficiency of the fire. Additionally, downdraughts can cause smoke to be blown back into the house, which can be dangerous. Capping a chimney will create a barrier to prevent air from being sucked back into the chimney from outside, and ensure the fire performs effectively.
Reduce the risk of fire
Chimney caps can also act as spark arrestors. Often, sparks and embers are released into the air from the chimney, and these have the potential to start fires, particularly in dry areas or on thatched roofs. Chimney caps and spark arrestors prevent these sparks and embers from passing out of the chimney space, therefore reducing the risk of fires being started.
 Prevent blockages
When the chimney top is open, it allows debris to fall into the chimney and build up, causing blockages. This can reduce the efficiency of the fire, by reducing the amount of air and smoke that can pass out through the chimney but can also increase the risk of fires occurring outside of the home.
Keep animals out
Open chimneys can often appear to be a source of warmth and shelter for animals and birds, so they will often get blocked up with nests. Often these animals enter the chimney space, but then get stuck and are unable to leave, resulting in decomposing bodies, as well as insects such as flies and maggots. Adding a chimney cap to the chimney top will prevent animals from entering the chimney, meaning that they will not get stuck and attract other insects to enter your home.
Which chimney cap do I need?
There are different types of chimney cowls, such as birdguards, cappers, H cowls and so on. Each type comes with its unique benefits and is generally designed to deal with a specific issue.
To help you choose the right product for your home, we’ve put together an in-depth Chimney cowl buyer’s guide.
In the meantime, here are some considerations you should bear in mind.
Disused chimney
If the chimney is not in use, the easiest thing to do is cap a chimney with something like a patio slab or roof tile, because no air movement will be required to keep the fire burning, and no smoke will need to pass through the chimney. However, if there is no ventilation in the upper half of the chimney, this should not be done, as internal condensation may occur, leading to dampness and mould.
Another option when capping a chimney that is no longer in use is to use a disused chimney cap, which is simply a terracotta or metal disk that fits over the top of the chimney pot easily and quickly. This can even help reduce heat loss via the chimney.
Chimney in use
If the chimney is still in use, the chimney cap needs to be of a design that provides enough ventilation for the fire to burn well and for the smoke to be taken up and out the chimney, whilst also protecting the chimney from water ingress, downdraughts, fire risk and blockages. There are a number of chimney cap options for chimneys that are still in use.
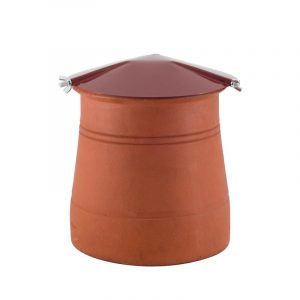
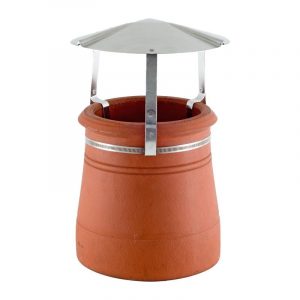
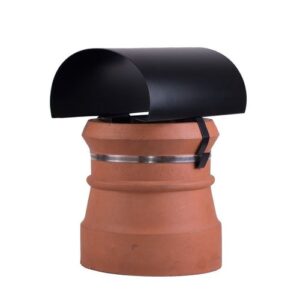
The most simple chimney cap is also known as a raincap. It is shaped like a disk, as with the chimney caps for unused chimneys, but is fitted on legs, so that there is enough room beneath for smoke to pass out of the chimney. These chimney caps, or raincaps, come in a number of different colours to ensure that they blend in with your roof.
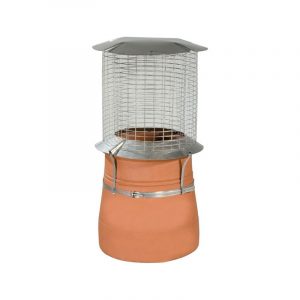
Another form of a chimney cap is the spark arrestor. These are metal mesh cylinders, with a solid metal lid on the top, that prevents sparks and embers from exiting the chimney, and potentially setting the ground or roof alight. The mesh allows air to pass into and out of the chimney, whilst also preventing any animals or materials from entering the chimney space.
Chimney caps vs balloons – what’s the difference?
There are two types of chimney balloons, and each has a different function. If you’re looking to prevent pests or birds from nesting inside your chimney, then you want to consider a mesh balloon, normally made from galvanised metal. These can also be used in gutters or placed at the opening of drainpipes to stop leaves and dirt from blocking your guttering.
Another type of chimney balloon is an inflatable one made from fabric, which is placed inside the flue. Unlike chimney caps and galvanised wire balloons, its main function is to prevent heat loss by inflating snugly inside the chimney walls and sealing any gaps where heat might escape. It is a temporary but very effective feature, and can be easily removed when your fireplace is in use. This product is particularly useful if your home is prone to ‘the stack effect’. This means that if you have a taller property or chimney, warm air will be more likely to escape quickly because heat rises. Colder air is then drawn from other spaces into your home, lowering the temperature overall. Installing an inflatable chimney balloon would mean that heat is maintained much more effectively.

How to cap a chimney
The specific method for capping a chimney can vary depending on the type of chimney and the desired level of sealing.
With that in mind, here’s a general overview of the steps you’ll need to follow:

Step 1: Preparation
Before you begin, ensure your safety by using appropriate personal protective equipment such as gloves and safety glasses. Take necessary precautions and consider using a ladder or scaffolding to access it safely.
Next:
Determine the type and condition of your chimney. Chimneys can be masonry (brick or stone), metal or pre-fabricated. The materials and design of your chimney will influence the capping method you choose.
Step 2: Measure up
Take accurate measurements of the chimney opening. This will help you select the right size and type of chimney cap for your specific chimney.
Step 3: Prepare the chimney cap
Follow the manufacturer’s instructions for assembly and any necessary adjustments. Some chimney caps may require minor modifications or the installation of mounting brackets.
Step 4: Install the chimney cap
The installation process will vary depending on the type of chimney cap, the installation process may vary.
For metal caps
Place the cap over the chimney opening and secure it using screws or brackets as instructed by the manufacturer. Ensure a snug fit but avoid overtightening screws to prevent damage to the chimney.
For mesh caps
Position the mesh cap over the chimney opening and secure it in place using screws or clips. Make sure the mesh is securely attached to prevent it from being dislodged by wind or animals.
For combination caps
Follow the manufacturer’s instructions to install the combination cap, which may involve attaching metal and mesh components.
Step 5: Test the cap
Once the chimney cap is installed, ensure it is properly secured and that there are no gaps or loose parts. Give it a gentle push or tap to check for stability.
Step 6: Clean up
Remove any debris or tools from the chimney area and ensure that the immediate surroundings are clean and safe.
That’s it – you’re done!
Final thoughts
Capping your chimney is hugely beneficial in the long run. It’s definitely one home improvement project you should consider seriously.
Before we leave you, a final word of advice:
Chimney capping may require professional assistance, especially for complex installations or if you are unsure about the process.
We recommend that you consult a chimney specialist or professional contractor if your chimney has unique characteristics or structural issues.
Was this guide useful?
Mentioned in this product guide:


