
Here at Roofing Superstore, we have a number of Lomanco vent turbines to choose from to ventilate roof space easily and at a low cost, but how do you install your Lomanco vent turbine? We’d always suggest using the instructions included in the packaging of the vent turbine, but we’ve created this guide to help make the installation process easier.
It’s important to remember that the Lomanco vent is an exhaust vent, so is only half of your ventilation system. You need to also install intake vents to balance the ventilation system, and they should be balanced 50/50 with the exhaust vent.

Table of contents:
- How many Lomanco vent turbines do you need?
- Determining the roof pitch
- Deciding where to install the Lomanco vent turbine
- How to mark and cut the hole in your roof
- Secure the turbine base and seal seams
- Fit the turbine head
How many Lomanco vent turbines do you need?
The chart on top of the Lomanco turbine box should give you an indication of the number of vent turbines and intake vents you need according to the attic floor area, but we’ve outlined a rough guide below. For more information, check out our guide on “How many turbine vents do I need?”, or use Lomanco’s online calculator.
| Attic floor space (m2) | Number of turbine vents required | Number of C816 intake vents required |
| 1000 | 2 x 12" turbines | Minimum of 9 |
| 1500 | 2 x 12" turbines | Minimum of 9 |
| 2000 | 3 x 12" turbines | Minimum of 13 |
| 2500 | 4 x 12" turbines | Minimum of 17 |
| 3000 | 4 x 12" turbines | Minimum of 17 |
| 3500 | 5 x 12" turbines | Minimum of 21 |
Determining the roof pitch
The first thing you need to do is determine the pitch of your roof before installing your Lomanco vent turbine. If you don’t know the pitch of your roof, there is a pitch gauge that is included within the packaging. To use the pitch gauge, simply put the roof peak mark at the peak of your roof, and place a straight edge on the opposite side of the peak. Read the gauge at the bottom of the straight edge – this is the pitch of your roof.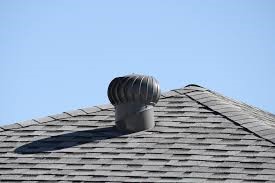
Next, you need to line the corresponding pitch number on the elbow with the mark on the base flashing. Screw the elbow onto the base with the screws provided, using the two pre-drilled holes.
Deciding where to install the Lomanco vent turbine
The next step is to decide where you want the Lomanco vent located on the roof. We’d recommend trying to install it as close to the roof peak as possible, whilst ensuring that it is not noticeable from the front of the house. When you’ve decided how far down the roof you want to place your turbine vent, you need to make sure there are no rafters beneath. To do this, tap around the roof surface and locate the rafters, making sure you choose to cut the hole for the vent turbine between rafters.
How to mark and cut the hole in your roof
To mark the hole, use the base as a template, marking the line around the inside of the vent. Once marked, simply cut the hole along the marked line. After the hole is cut, you may need to loosen some surrounding shingles and ensure that there are no roofing nails sticking out that would get in the way of the turbine base. Then simply slide the turbine base under the shingles and into place above the hole. Once in place, secure with roofing nails at the top, bottom and sides.
Secure the turbine base and seal seams
Once the base is installed, you need to level the top of the elbow, by turning it counter-clockwise. Once this has been done, secure it with the locking clamp.
Before installing the turbine head, it is essential to seal the adjusting seam – the seam between the base and the elbow – on the inside, and seal the locking clamp. Then make sure you seal any exposed roofing nails on the outside.
Fit the turbine head
The last stage is to fit the turbine head. Simply place on top of the base, and line up the pre-drilled holes and use screws to fasten. Once the installation is complete, check the turbine vent moves freely and smoothly.
If you have any questions about the installation process of a Lomanco vent turbine or have any other queries, feel free to call our team on 01752 692 760 or use the live chat and they will be more than happy to help.
Was this guide useful?
Mentioned in this project guide:


