
15th February 2023
Rubber floor tiles are a popular and widely used type of flooring. Many installers and homeowners utilise these across different properties. So, whether yours is a commercial or domestic setting, consider rubber floor tiles and find out how to lay them with our handy guide!
Table of contents
- Where can I lay floor rubber tiles?
- How to lay rubber floor tiles
- How to cut rubber floor tiles
- Do I need to put anything under rubber flooring?
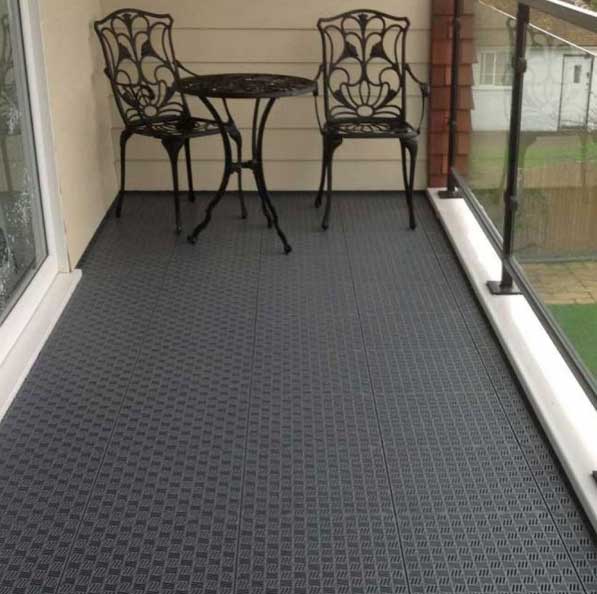
Where can I lay floor rubber tiles?
Rubber floor tiles are commonly used in a variety of areas. Some of these locations include, but are not limited to:
- Roof gardens
- Roof terraces
- Balconies
- Patios
- Children’s play spaces
- Cellars
- And many more!
When it comes to styles, you have a plethora of options. Whether you want standard black tiles or a unique red for your personal domestic space, there’s a vibrant selection to find your ideal tiles.
External rubber floor tiles are great when it comes to rain because the rainwater can drain through the tiles. An example of this is Eurodec’s Premier Rubber Tiles. Check them out!
You might also want to be aware that some rubber floor tiles have a protective coating. This protective coating (aka the PU or polyurethane layer) across the top of the tile could decline if set in areas where prominent levels of sunlight are apparent (rooms with bi-fold doors etc). Although it will not affect the longevity of the rubber, the layer will deteriorate. As a result, you will need to remove and replace the flooring over its usage.
How to lay rubber floor tiles
Laying rubber floor tiles is a straightforward process. One of the most efficient reasons is that they have an interlocking design, meaning adhesive is not required to keep the flooring in place. This is efficient for the removal and replacement process of the tiles as they can be dealt with if they become damaged in the future.
You can also purchase them pre-cut without needing to cut them during the installation. So, what do you need to install rubber floor tiles?

What you will need
- Rubber floor tiles
- Jigsaw, handsaw or Stanley knife
- PU adhesive
- Steel straight edge
1. Prepare the fitting area for the tiles.
Your deck will need to be level, free draining and in a suitable place where you can fit rubber tiles.
2. Start in the corners.
Each tile should have pre-drilled slots for the connecting pins to fit. Lay your tiles in the corners of the area you want to cover first. The pins must face the direction of the installation. Doing so will ensure that the installation is much smoother.
3. Continue with the rest of the rubber tiles.
Lay the first row. When happy with the alignment, you can move forward with laying down the other tiles. Most importantly, ensure that you lay every second row in a brick-bond pattern and leave half a tile at each end. This will help with the strength of bonding thanks to the interlocking formation.
Note: If you need to cut the tiles, use a steel straight edge and low-speed jigsaw, handsaw or Stanley knife. Wet the blade to help with the cutting process where you can.
3. (Optional) Using adhesive.
Some areas of the rubber flooring tiles might be exposed to wind uplift: a more likely issue that occurs on exposed edges. If so, you can use a PU adhesive to help keep it secured down in place. You must leave at least a 2mm gap between the tiles and ensure the adhesive bead does not block any drainage channels near the flooring.
After 24 hours, your new rubber tiles are ready to use!

How to cut rubber floor tiles
Typically, you can obtain rubber floor tile kits with pre-cut flooring. Their typical design allows them to fit in corners and around the borders of rooms. However, if you have not taken the correct measurements, you will have to take it upon yourself to make some adjustments to the tiles before laying them down. You can do this using a Jigsaw, handsaw or Stanley knife.
Do I need to put anything under rubber flooring?
An underlay is not always necessary for rubber floor tiles. The design means they can be applied directly to any of the following flat roof substrates:
- Felt
- Asphalt
- Single ply
- EPDM
- Fibreglass
- Concrete
- Wood
Eurodec Premier Rubber Tiles, for example, are designed with a flat underside which prevents point-loading; a problem that risks indentations when the tiles are laid on asphalt substrates. This issue is common when associated with traditional rubber tiles manufacturers with a pointed egg-box-shaped backing.
Want to know more about rubber tiles or other flooring accessories and more? Check out our other range of Help and Advice guides for additional information or support with your products and projects. Alternatively, you can contact our friendly customer service team for help with your queries.

