Felt is an incredibly popular roofing material amongst DIYers and roofing professionals due to its ease of installation and budget-friendly costs. Felt roofs are most commonly used on shed roofs, garage roofs and other outbuildings, but can also be used on flat roofs such as on small extensions and porches.
Here at Roofing Superstore, we have everything you need to felt your roof, from roofing felt and nails to timber battens and plywood. If you’re unsure of anything or have any questions, don’t hesitate to get in touch – call our team of experts on 01752 692760 or use the live chat in the bottom right-hand corner.
Table of contents:
Why choose a felt roof?
Lightweight
Felt is an extremely lightweight material, which means it can be used on a number of weaker and less structurally sound buildings, such as garden sheds and outbuildings without any concerns that it will be too heavy.
Easy to install
Previously, roof felt was applied using a torch-on method, which was relatively complex and required special tools, as well as a professional. However felt can now be fitted using a simple hammer and nail technique, as well as some roofing felt adhesive, meaning it is easy to do and relatively quick, and can be undertaken by DIYers and professionals alike.
Easy to repair
Felt roof repair is relatively easy. The material can simply be patched up if there is a tear or hole in the roof, unlike other roof materials that can have a much more complex and time-consuming repair process.
Budget-friendly
Another benefit of using felt on a roof is that it is relatively inexpensive, whilst still providing a good and durable roofing surface. This is why it is perfect for low-scale and relatively low-budget projects, to create a functional yet low-cost roof.
How to felt a shed roof
Different roof types require different application methods. Here are some steps to felting a shed roof!
1. Preparation
The first step when looking to felt a shed roof is to remove any existing old roofing felt, in order to create a clean surface on which you can fix the new felt rolls. Additionally, remove any rotten or damaged timber and replace it where required.
2. Calculate the roof area
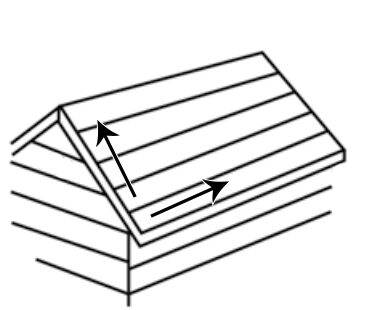
Next, measure the surface of the shed roofing to calculate how much felt you’ll need – don’t forget to add an extra 5-7.5cm for overlaps at the edges and the gables. Generally, if felting a pitched shed roof you’ll require 3 pieces of felt – 1 for each side and then one to overlap the two edges, but this may vary depending on the size of the shed roof and the width of the felt rolls.
3. Lay the first piece of felt
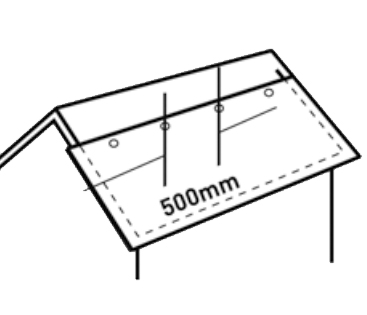
Lay the first length of the shed roof felt across the bottom part of the shed roof, ensuring the overhang is there, before nailing the top edge of the felt with galvanised nails. Try to achieve an even gap of around 50cm between each nail. Then fold the edges of the felt around the edges of the roof and nail them into place.
4. Lay the second piece of felt
Now take the second piece of shed felt and lay it across the roof, ensuring there is an overlap over the first roll of felt – try to ensure this is around 5-7.5cm. Again, nail the top of the roofing felt into place.
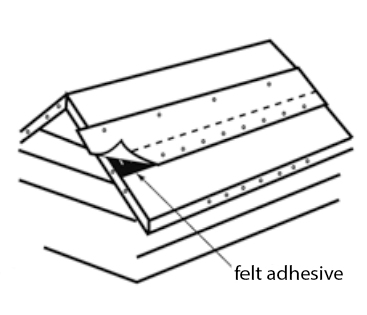 5. Add felt adhesive
Once the second piece of felt has been nailed into place, brush the felt adhesive across the join between the first and second layers. Use a downward brushing motion and then nail the join for extra security.
6. Repeat across the roof
Continue this process until one side of the shed has been completed, and then repeat on the other side.
7. Add a capping sheet
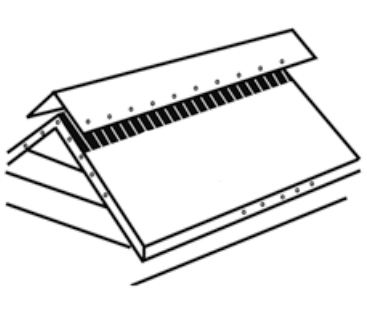
Once both sides of the roof have been felted, a capping sheet is required. This is a piece of felt that sits over the ridge of the roof. The capping sheet needs to be placed across the top of the roof, ensuring that there is a 7.5cm overlap over the felt on each side of the roof. Apply felt roof adhesive to the underside of the ridge sheet on both sides and press it into place, before nailing it down at 5cm intervals.
How to felt a flat roof
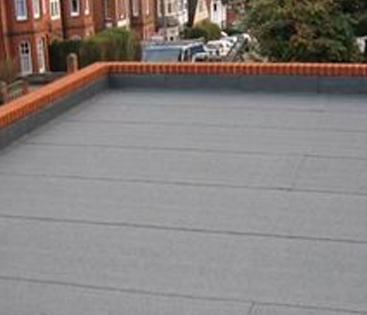
Felting a flat roof is slightly different from felting a shed or garden outbuilding. When felting a flat roof, you’ll add several layers of felt to create a watertight and impenetrable seal.
1. Preparation
Before beginning to felt a flat roof, it is important to ensure the roof is stable and able to withstand the weight of someone standing on it. If there are any rotten pieces of timber, these should be replaced before work can begin. Any old or pre-existing flat roof felt should also be removed at this point.
2. Calculate the amount of felt required
Once you’re confident that the roof is stable and secure, the next step is to measure the roof. Measure the length and width, then multiply these figures to give the square footage, ensuring you allow for extra to overlap at the edges. Felting a flat roof requires three layers of felt, so triple the square footage in order to calculate how much felt you require.
3. Unroll the felt and leave out
Now lay the roofing felt out across the roof, or dry ground, and leave it there for half an hour. Once it’s been rested it should be easier to manipulate and fix into place.
4. Lay the first piece of felt
The next step is to begin fixing the felt to your roof. Use galvanised clout nails to nail the first sheet of felt onto the roof. We’d recommend nailing from the centre of the edge of the sheet and working outwards. Leave about 5cm between each nail, and ensure the sheet is pulled tight and sitting in line with the roof.
5. Add more felt if required
If required, add another roll or two of felt to ensure the roof is completely covered. Always ensure there is at least 5cm of overlap between each sheet, and nail down the felt from the centre outwards as before.
6. Spread adhesive
Now spread a layer of felt adhesive over your nailed-down roof sheets. This should be relatively thin and even.
7. Lay the second layer of felt
Next, lay the second layer of felt on the roof. Ensure any joins on the first layer are overlapped, and any air bubbles have been smoothed out, and then nail it down as before.
8. Spread adhesive
Spread adhesive on the second layer of felt as before, and then place the final layer of felt on top. Again, ensure there are no air bubbles, there is at least 5cm of overlap and there is also overlap around the edges of the roof.
9. Smooth the surface
Pat down the surface with a trowel, or by walking on it. This will help to ensure there is a tight fit and that all three layers of felt are bonded together.
10. Add the final layer of adhesive and gravel
Now the final layer of adhesive can be added. This will provide maximum weatherproofing, ensuring no water passes through. Finally, the felt surface can be coated with gravel or similar aggregate. This will add further durability and strength to your roof.


