If your house has a pitched tile or slate roof, it most likely features ridge tiles at the very top.
And while this is something we rarely think of, ridge tiles play a vital if somewhat underappreciated role – one that could make all the difference between a solid, secure roof and a damaged, leaky one.
That’s why you need to know how to go about fixing ridge tiles whenever necessary.
At this point, you’re probably wondering:
Will my roof leak with missing ridge tiles?
Do ridge tiles have to be mechanically fixed?
What goes under ridge tiles?
To answer these important questions and more, at Roofing Superstore we dug deep to put together a comprehensive guide on how to fix ridge tiles.
Here’s what we’re going to cover.
Table of contents:
- What are ridge tiles?
- Dry ridge system vs mortar
- How to fit mortar-bedded ridge tiles
- How to fit dry ridge tiles
- Final thoughts
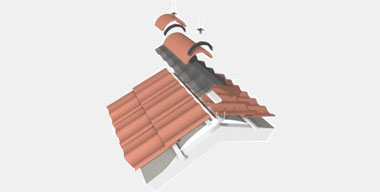
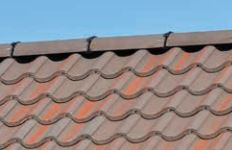
What is a ridge tile?
A roof ridge is where the two planes of a pitched roof meet at the apex. In turn, roof ridge tiles cover this horizontal line, completing the roof covering and providing protection from leaks as well as heat and wind.
Now:
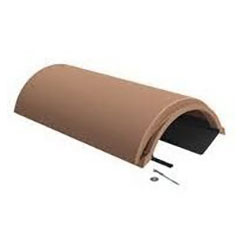
While they come in plenty of different colours and designs, there are two basic types of ridge tiles – half round and angled (also known as angular).
What’s the main difference?
Half round ridges are the traditional choice, which is why you’ll see them on older, especially historic, buildings.
In contrast, angled ridge tiles provide a more contemporary, edgy look, especially on slate roofs. So, it should come as no surprise that ridge tiles for slate roof are an increasingly popular choice with homeowners.
That being said:
We should point out that both solutions are incredibly versatile, so it’s up to you which one you’re going to go for.
Now that we’ve covered the main types, let’s take a closer look at the different ridge tile systems.
Dry ridge system vs mortar
Mortar has been the traditional way to fit roof tiles, going back centuries. However, roofing mortar can become quite brittle over time, posing growing sustainability issues.
As a result, the UK government introduced new regulations in the shape of BS 5534 in 2014. Superseded by ‘BS 5534:2014+A2:2018 Slating and tiling for pitched roofs and vertical cladding. Code of practice’ four years later, the updated standard stipulates that mortar bedding alone is not sufficient when replacing a ridge tile.
Step in the dry ridge system (also known as mechanical fixing) and mixed mortar-mechanical solutions.
Here’s how you go about fixing ridge tiles depending on the system.
How to fit mortar-bedded ridge tiles
Whenever you engage in serious DIY work on your roof, you should always use a combination of ladders and scaffolding.
Once you’re up there, proceed to carefully remove the old ridge tiles. Start from the opposite end of the roof from your ladder.
Why is that?
The thing is:
Ridge tile mortar mix has a lengthy cure time, taking up to 24 hours to get to 60% of its total compressive strength. And you don’t want to be stuck on the roof that long, do you?
Now:
Depending on how long your ridge tiles have been up there and the general condition of the mortar, you might be able to remove them with your hands. If not, use a hammer.
Carefully remove any debris and dust before applying a bed of mortar with a trowel. It should be a 1:3 ratio of ridge tile cement to sharp sand. Embed the ridge tile and press it down firmly. Remove any excess mortar and smooth out the remainder.
That’s one done! Keep going with the rest in the same way.
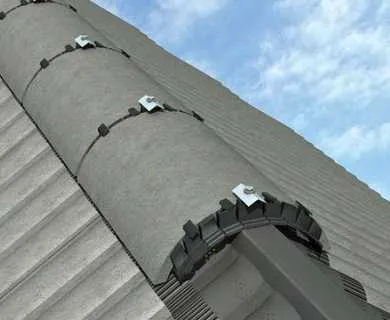
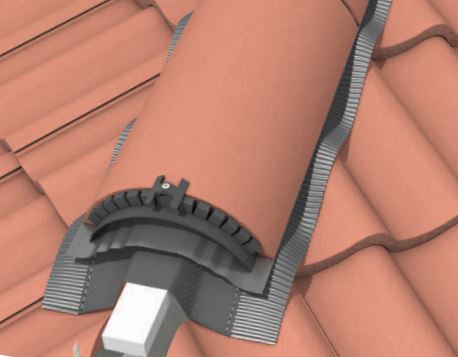
How to fit dry ridge tiles
Dry fix ridge tiles, also known as mechanical ridge tiles, are easier to fit than mortar-bedded ones. While each dry ridge kit comes with its own manufacturer instructions, the general process of dry ridge installation is as follows.
Using a pry bar, loosen the rafter and affix the brackets under them. Bend the brackets to the necessary height with a hammer. Once all the brackets are in place, attach the batten. Make sure it’s cut to the required length.
Next:
Most kits come with a ventilated ridge roll. Unroll it along the ridge and nail it into place. There’s no need to worry about leaving it hanging off the edge of the roof slightly. Then, remove the tape from the butyl adhesive and press firmly.
You’re nearly done! Now comes the easy bit – ridge tile fixing with the supplied ridge unions. Slide them into place and check with a spirit level to make sure the tiles are flush.
Finally, secure the tiles with the recommended number of union clamps as per the manufacturer’s instructions.
Final thoughts
Fixing ridge tiles correctly can be quite challenging.
Nonetheless, it’s a DIY task you shouldn’t be afraid to take on. Depending on the length of your roof, it might take a while, so it’s important to plan ahead.
Make sure you’ve checked the forecast, as you don’t want to do this when it’s raining.
The good news is:
Now that you know how to fix ridge tiles, you’re all set to provide your roof with the cover it needs to prevent leaks.

Was this guide useful?
Mentioned in this project guide:


