
Have you been wanting to create some shelving for your home? Are you in need of a quick, easy, and stylish storage solution? If you’re nodding your head, you are in luck because a humble piece of plywood can be transformed into a wonderful shelf. Whether you need a perfect storage solution for your books or an eye-catching centrepiece for your ornaments, a plywood shelf can do just that!
With a few tools, elbow grease and a can-do attitude, you will have your own homemade plywood shelf.
In this handy guide, we show you how to turn your plywood into a shelf as well as some design inspiration to get you started.
Contents
- What is plywood?
- Benefits of plywood
- Questions to ask yourself
- How to make plywood shelves
- How to make shelves out of plywood
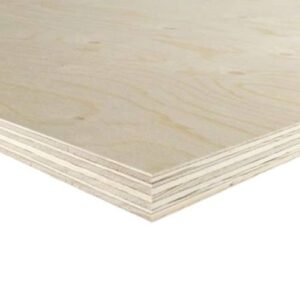
What is plywood?
Plywood is a type of multipurpose construction material made from layers of solid timber veneer. Due to its multiple layers plywood is incredibly strong whilst being light. There are two main types of plywood and both are great for different reasons.
Types of plywood
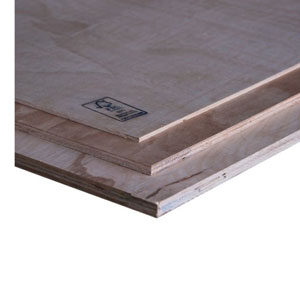
Structural Plywood
Structural Plywood is usually used for structural use in buildings, due to its high strength and durability. This type of plywood can also be used for crates, boxes, and outdoor furniture.
General Purpose plywood
General plywood comes in 4 by 8-foot sheets of different thicknesses and in a variety of grades. Each side is rated from A to D, with A being the highest quality and D grade being the lowest quality. You can find out more about plywood sizes in our dedicated guide.
Benefits of plywood
There are many benefits to using plywood as a shelving material, from its strength to its versatility and so much more
Here are a few reasons why plywood makes a good shelf:
Plywood is known for its strength so it would be a great addition to your wall, but we would not recommend testing this by hanging off the edge of your shelf. That could go terribly wrong! A plywood shelf is also lightweight and reliable as it does not warp making it perfect for keeping your items on show without the worry of it dropping off!
Another great quality of a plywood shelf is how aesthetic it is. Plywood has a knotted, and natural grain nature which would explain the booming trend for exposed plywood. So, once you have built your plywood shelf you can show off its beauty on Instagram #aestheticsfordays.
However, if the exposed plywood trend is not your cup of tea, you can easily paint your plywood shelf to add your own personality and style to it.
Questions to ask yourself
Before you begin to build your shelves from plywood, figuring out what you would like your shelves to do is a good place to start. It is best to ask yourself these few questions:
- What purpose will these shelves serve?
- Do I want a practical solution to a storage issue?
- How many shelves do I need?
If you are scratching your head for ideas, don’t fret take a peek at these ideas below:
DIY plywood shelf ideas
- Make a statement with this twist to a bog-standard shelf. Adding industrial plastic or metal pipes to your shelves will elevate your shelf!
- Rope shelves are beautiful with accents of twill rope; a perfect addition for your plants to stand on.
- If you are going for a minimalistic finish floating shelves are the perfect shelf match for you!
Helpful tip: This works best with a thicker sheet of plywood - Hexagonal shelves are a great way to add geometric accents to your home. You could also add mirror sheets behind the shelving for a stunning entryway centrepiece.
- Bring out your inner 90s with Tetris-themed shelves, it will require a lot more thought and patience, but it will definitely be worth it.
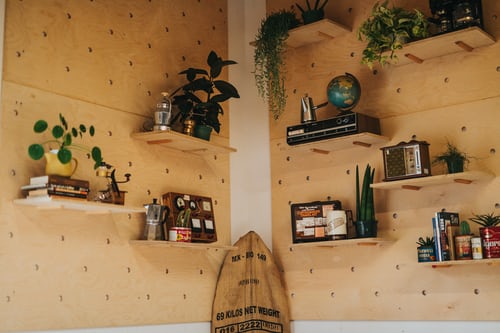
- Pegboard shelves are trendy with the added benefit of giving you more control and flexibility to change the layout if you get bored with the look.
How to make plywood shelves
What you will need
- PPE
- Plywood
- Measuring tape
- Paper Pencil
- Ruler
- Screwdriver/ Electric screwdriver
- Jigsaw/saw
- Drill
- Sandpaper/ Sander
- Wall brackets
- Screws and wall plugs
- Masking tape
- Wood stain/Paint
- Paintbrush/Paint roller
- Spirit level
How to make shelves out of plywood
Step 1: First collect all your tools, lay down a dust sheet and rest your plywood sheet against a flat surface.
Step 2: Check to see whether the wall you are working on is made from plasterboard or brick. This will make a major difference in your shelf staying put. Simply put if it’s plasterboard you will need wall plugs to provide your shelf with extra support!
Step 3: Next, sketch out your shelf design using a piece of paper and a sharp pencil. Figure out what measurements you would like your shelf to be. If you need multiple cuttings of plywood take this into account.
Step 4: Next, measure out your shelf lengths from the plywood sheet with a measuring tape. Using your pencil and ruler mark out the length and width measurements on the plywood sheet.
Step 5: Once you have your shelf measurements, cut out your pieces with a jigsaw/saw and put them aside.
Safety tip: Before any project please make sure you have the correct PPE. Safety first always!
Step 6: Next sand down any rough edges on the plywood shelves
Step 7: Once you have sanded the shelves down, the next step is to put up the shelf brackets. Using a ruler measure out a straight line, where you would like the bracket to be. This will be your guideline.
Step 8: Next hold your bracket to the guideline. Use a spirit level to check it is straight, then mark through the bracket holes with a pencil. This will be where you drill the holes to keep the bracket in place. Repeat with the second bracket.
Step 9: Now using a drill, drill your screw into the marking made on your wall. Repeat with the second bracket.
Step 10: Finally get the plywood shelf and place it on top of the brackets. Do a final check with a spirit level to make sure your shelf is vertical.
Step 11: Voila! Just like that, you have your own DIY plywood shelf!

Was this guide useful?
Mentioned in this project guide:


