
A pergola is a great way to update your garden, creating a point of interest and changing the landscape. Although they are readily available to purchase, they can be quite costly, so knowing how to build a pergola is a great budget-friendly alternative. It also means you get to create the exact design and customise it however you like, unique to your garden. This guide carefully explains how to build your very own pergola in five easy steps.
Table of contents:
- What is a pergola?
- How to build a pergola
- Planning
- 1. Planning
- Supplies you’ll need
- 2. Preparation
- 3. Installing the uprights
- 4. Fix the main beams into place
- 5. Fix the cross beams into place
- Next steps
- Final thoughts

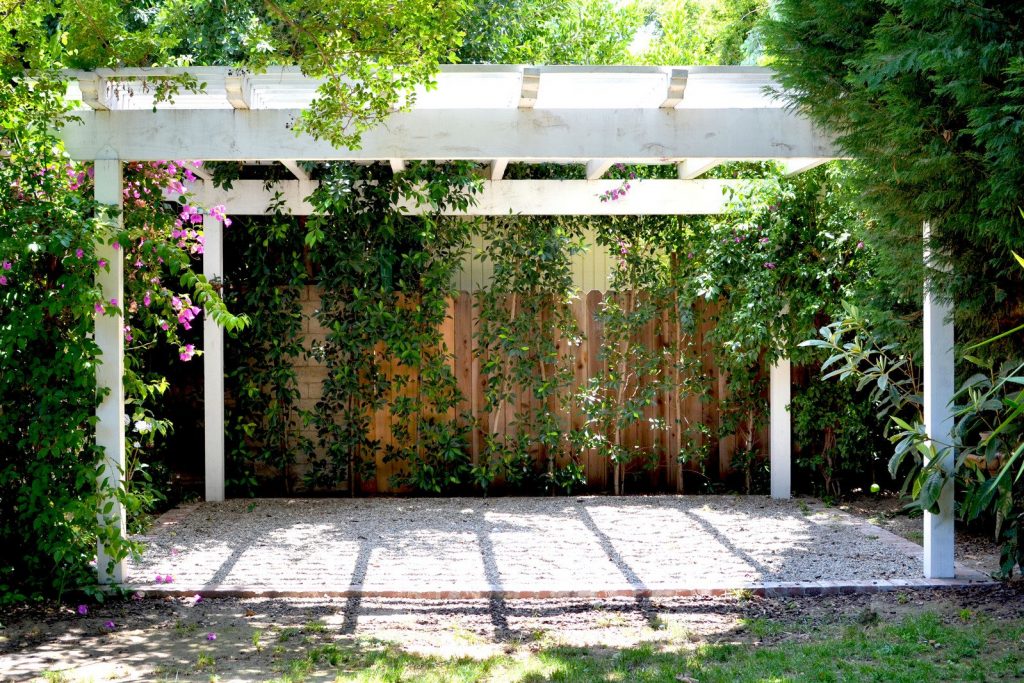
What is a pergola?
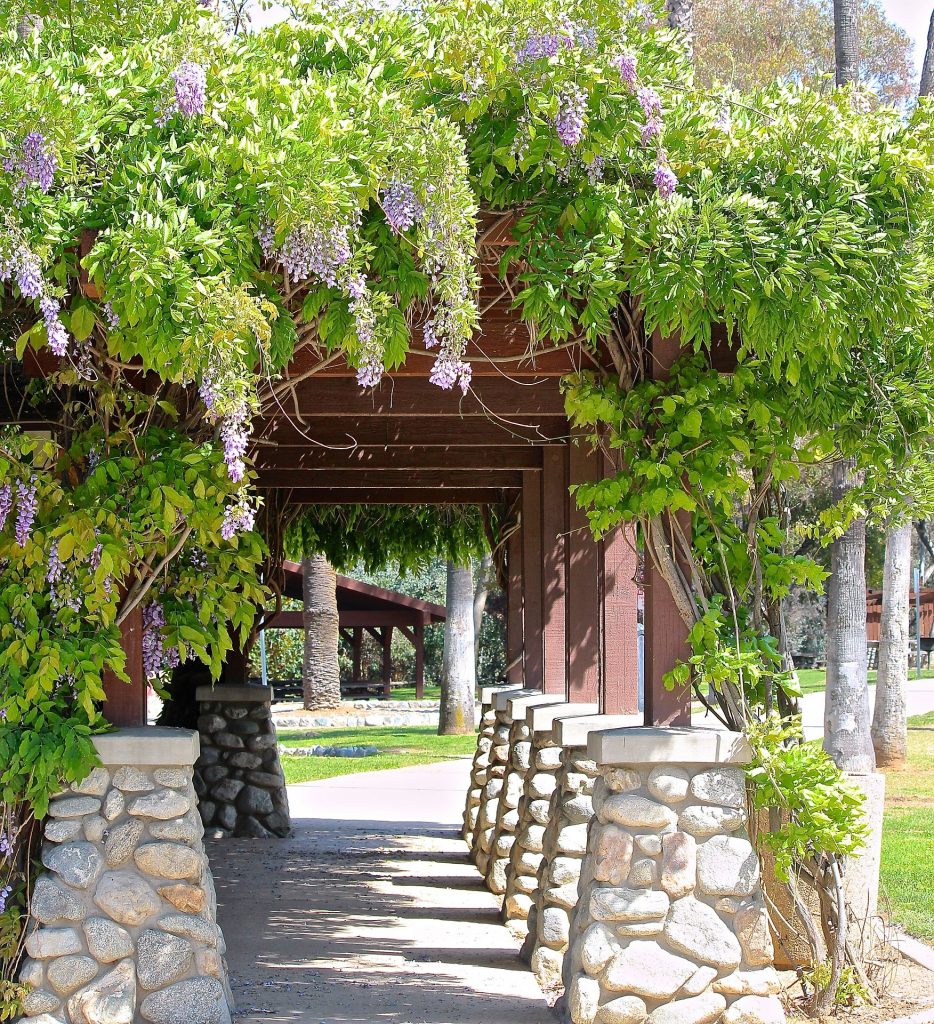
A pergola is an outdoor structure, normally made from wooden timbers. These timbers form a number of columns which support the roof, which can either be solid or open. Pergolas are a standout garden feature, and have many uses. They can create a shaded area to relax in, a walkway, or an outdoor dining area to name a few. Traditionally, the pergola structure is used to grow plants up and around, particularly vines and other winding plants.
How to build a pergola
Building a pergola is relatively straightforward, and is the perfect way to transform your garden ready for summer. Before starting to build your pergola, you’ll need to create a plan of the pergola design, and decide on the number of battens you require, as well as the heights and lengths of battens needed. We have a range of different timber battens available to choose from, just ask our team for any advice if required – call on 01752 692 760, or use the live chat and they will be happy to help.
1. Planning
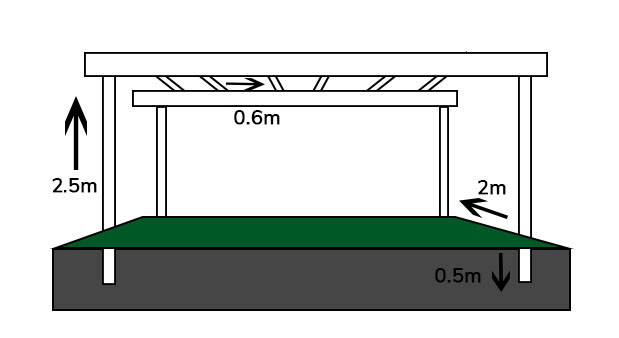
We’d recommend using upright posts that are no shorter than 3 metres, and consisting of 3×3″ or 4×4″ thicknesses. Don’t forget that the uprights will be sunk into the ground by around 0.5 metres, so if you require a height of 2.5 metres for your pergola, your uprights will need to be 3 metres.
Uprights should be approximately 1.8 to 2.5 metres apart, but if you’re planning to grow grapevines and other heavy vine-like plants up the pergola, we’d recommend decreasing the distance between uprights as the plants will add extra weight to the structure.
We’d recommend using 6×2″ battens for crossbeams and the main beam. Crossbeams should be placed every 0.6m across the main beam, with a 0.3m extension over either side of the main beam.
Supplies you’ll need
- 4x timber uprights
- 6×2 inch battens (Amount depends on how wide you want your pergola)
- Concrete for filling
- Shovel or spade for digging the holes
- Tape measure
- Spirit level
- Either a drill and coach bolts or
- Hammer and nails
- Saw
- Pencil
- Ladder
2. Preparation
Decide where the pergola will be best located in your garden or open space, and clear all vegetation from the area. If you’re working on a paved area, simply remove the paving at the points where the uprights will be installed.
Then clearly mark out where each upright will be located, using the measurements above and your design. Ensure the site is level, and if it isn’t, try to level it out as much as possible.
3. Installing the uprights
Dig a hole for each upright that is 1×1 foot wide, and 2 feet deep. Then put two uprights in their holes simultaneously, and balance a cross beam on the top. Use this to ensure they are in line. You can check this by placing a spirit level on the cross beam. If one post is higher than the other, either remove extra soil from one hole or fill the other hole in slightly. Repeat this for the rest of the upright posts, and ensure all posts are in line and level with each other.
The next step is to fill in the holes with concrete. Ensure they are all level before leaving them for a couple of days. If the uprights are relatively loose, you can use temporary wooden battens to add extra structure and support until the concrete is completely set.
4. Fix the main beams into place
Once the concrete has dried and the uprights are secure, you can fix the main beams. To do this, we’d recommend cutting out a section on top of the uprights, in which the main beam will rest. Check the main beam is level, then fix it to the uprights using nails or screws. Another option is to drill through both the upright and main beam, and then use coach bolts to secure them.
5. Fix the cross beams into place
Once the main beams are in place, lay the cross beams. These should have an equal distance at each side from the main beam. Mark where each cross beam meets the main beam, and then add notches at these points to allow the cross beam to sit tightly within the notch. Then fix each cross beam to the main beam – use nails, screws, or wood glue to do so.
Next steps
If desired, why not add a brace at each corner? This will not only add structural support but create an extra detail to finish off the look of the pergola. Choose a curved brace for a smooth and traditional finish, or a triangular one for something sharp and simple.
Now your pergola should be free-standing and complete! Add any paving or patio slabs back to the ground if required. Cut them to fit around the uprights as needed.
We recommend digging small plant beds around the uprights, and planting vines and other climbing plants at their feet. Use some loose cabling, string or ties to guide the plant up the pergola as it grows.
Final thoughts
Finally, why not build some timber decking beneath the pergola? This will provide an even and steady surface to place furniture, making it the perfect place to watch the sunset, enjoy some drinks, and simply relax. Here at Roofing Superstore, we have a number of timber decking and composite decking products to choose from to create the perfect decking to complement your pergola.
Was this guide useful?
Mentioned in this project guide:


