
Knowing how to slate a roof can seem like an overwhelming challenge. Roof slates are aesthetically pleasing, durable and hard-wearing, and have excellent waterproofing and weather resistant properties. With these things in mind, it’s no wonder fitting slate roofing can increase the potential selling value of your property. This guide will outline all of the benefits of having a slate roof and clear instructions on how to slate a roof yourself.
Table of contents:
- What is slate?
- How to slate a roof
- Getting started
- 1. Find out the pitch of your roof
- 2. Find out the required overlap
- 3. Roll out the roof membrane
- 4. Secure the roof membrane
- 5. Batten Placement
- 6. Lay the roof slates
- How to replace a slate
- Things to consider before installing slate
- What types of roof slate are there?
- Natural roof slate
- Natural roof slate
- Man-made roof slate
- Recycled roof slate
- Final thoughts
What is slate?
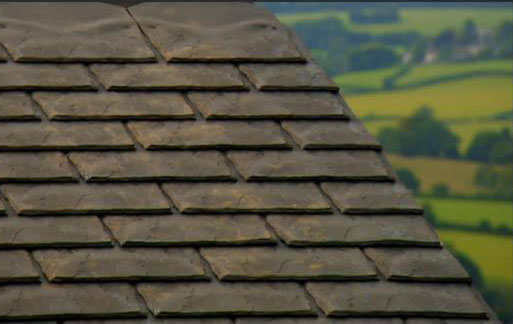
In its natural form, slate is a type of metamorphic rock. This means it is formed under extremely high temperatures and pressure. Quarries use specialist tools to extract it, splitting it at weak planes. The slate breaks away as smooth, flat sheets which have an excellent composition for layering on to a roof. Recognised by its distinctive blue-grey hue, slate is rustic but incredibly durable, and this combination is what makes it so popular.
So you’ve decided you’d like a slate roof, but how do you install it? This guide carefully explains how, along with expert tips and tricks to make the process as smooth as possible. As always, if you’re not 100% confident in upgrading your roof yourself, we recommend contacting a professional – a damaged roof is the last thing you need!

How to slate a roof
There are six main steps in slating a roof yourself, which are detailed below. Start by having all of the correct materials and tools. You’ll then need to find out the pitch of your roof and check the overlap measurement of the slate with the manufacturer. Then you’ll roll out and secure the membrane, followed by mapping and attaching the battens, and finally laying the slates with the correct overlap.
Getting started
Although the traditional method of slating a roof uses hooks, this can be time-consuming and complicated. Therefore, in this guide, we will be outlining how to slate a roof using pre-drilled slates.
Firstly, find out if your slates are pre-holed. If they aren’t you’ll need to pierce two holes into the slate, one either side of the short width, approximately a third of the way up the length of the slate. To do this, you can use a number of cutting and holing tools.
Before you begin installation, make sure you have the following supplies:
- Your chosen type of slate, pre-holed
- Roofing membrane
- Clout nails
- Hammer
- Roofing batten
- Galvanised nails
1. Find out the pitch of your roof

Before you start installing, you need to find out the pitch of your roof. The roof pitch dictates how much overlap you need with each slate. If you have a smartphone, you can access apps that have been designed specifically to find out the pitch or angle of your roof, such as the VELUX pitch roof app.
2. Find out the required overlap
Once you’ve found out the pitch of your roof, take a look at the slate manufacturer’s specifications. Each manufacturer will suggest the required overlap in order to form a stable and secure slate roof.
3. Roll out the roof membrane
Firstly, ensure your rafters or trusses are clean of any splinters or old nails that could damage the membrane. Then roll your chosen roofing membrane along the roof trusses – start from one bottom corner and roll it along to the other corner.
Repeat this method and work upwards to the top of the roof. Make sure the roofing membrane hangs over the bottom of the roof and into the gutter to provide and encourage any water that gets past the slates to drain off into the gutter.

4. Secure the roof membrane
Once you’ve rolled out the membrane, use clout nails to secure one edge. Then pull the membrane taut at the other end, and fix it into position, before adding a few more nails across the membrane where it meets the timber trusses for extra stability.
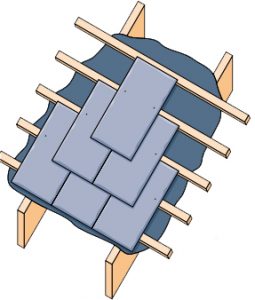
5. Batten placement
a) The next step is to work out the placement of the battens – to do this you’ll need two full-sized slates and an under eaves slate. Place two battens onto the roof on top of the overlay – don’t fix them down so you can move them around easily for adjustments.
b) Now place a full-sized slate onto a batten, with an overhang into the gutter of around 50mm, and with the pre-drilled holes lined up with the centre of the batten – then put temporary fixings into the batten.
c) Next, put the second batten underneath the slate, and slide it upwards towards the first batten. Take the eaves slate and position it onto the second batten, ensuring it reaches the bottom of the roofline.
d) Secure both battens into the roof rafters using galvanised nails – ensure both battens are parallel by measuring from specific points along the roofline, checking that the difference in distance between them remains the same.
e) Add a third batten, sliding it from the top downwards to below the top of the slates. Make sure that the top of the full-sized slate is sitting central to the batten.
f) Place a second full slate onto the third batten, ensuring you line the pre-drilled holes up with the centre of the batten – double-check the batten is parallel, then fix it into place.
If working with double-lapped slates, as most slate roofs are in the UK, you will see that both full-sized slates overlap the eaves slate. Double-check that this is the required overlap stated in the manufacturer’s guide.
If you measure from the top of one batten to the top of another, this gives you the batten gauge. This allows you to work out the distance between the battens on the rest of the roof. For example, if your roof is 500cm, and the pre-existing battens are 20cm apart, you will need a total of 25 battens, each 20cm from the previous one.
6. Lay the roof slates
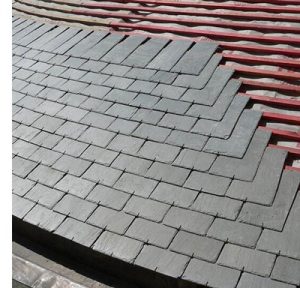
Now you have mapped the roof correctly, with the battens at the right distance apart, it’s time to lay the slates. Start by laying the under eaves course, creating a staggered pattern for stability – you need a 5mm gap between each slate to allow for natural expansion.
How to replace a slate
To replace a slate on a slate roof, you’ll require a slate ripper, tin snips, and a hammer, as well as a new slate and a strip of lead.
Firstly, put the hooked end of the slate ripper underneath the damaged slate, trapping the nail in the hook. Then hammer the handle of the slate ripper, to force the nail out of place.
Once you have removed both nails, slide the broken slate down and take it out. Now compare the broken slate with the new slate. The replacement slate needs to be exactly the same size, so trim if necessary.
Take a strip of lead and nail it into place against the batten, then push the replacement slate up and into position, ensuring it is level with the other slates. Now fold the lead strip over the bottom of the replacement slate to keep it in place, acting like a hook. This should hold the replacement slate securely in place.

Things to consider before installing slate
Before you install your new slate roof, take the time to familiarise yourself with the different kinds of slate on the market. Each one has distinct features and differing prices to bring your vision to life.
What types of roof slate are there?
A slate roof isn’t limited to one type of slate material. Here at Roofing Superstore, you can choose from an array of unique slate solutions. Here is a brief summary of notable points regarding the types of slate available to you:
Natural roof slate
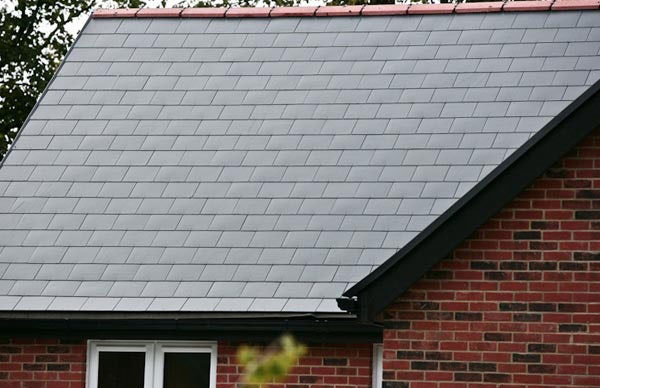
The natural roof slate is exactly what you’d expect. This authentic slate roof solution provides the ultimate natural slate look and comes with an array of benefits. Not only does it look great, but it is also fireproof, frost resistant and requires little maintenance. It also comes in a variety of different styles including Spanish slate (below), Welsh slate, Canadian slate, Brazilian slate and Argentinian slate.
Man-made roof slate
Man-made roof slate is considered more eco-friendly for consumers. However, despite their development process taking a more modern approach, their look doesn’t steer far from the traditional slate appearance. Due to their manufacturing, they also have a greatly reduced risk of breaking. This is because manmade slates are mostly made from fibre cement, a composite material known for its durability.
Recycled roof slate
A recycled roof slate is the result of combined waste slate materials. This goes even further regarding the environmental impact as there is no manufacturing process involved in the creation of the final project. In turn, this means that the amount of wastage is reduced.
Final thoughts
For any questions, queries or product recommendations, don’t hesitate to give our team of experts a call on 01752 692 760 or use the live chat and they will be happy to help.
Was this guide useful?
Mentioned in this project guide:


