
When building a home, office, or outbuilding, or looking to create more space, why not build a stud wall? Simple, effective, and budget-friendly, a stud wall is an easy project for DIYers and professionals alike. Here at Roofing Superstore we’ve created a quick guide on how to build a stud wall, to give you an outline of the processes involved.
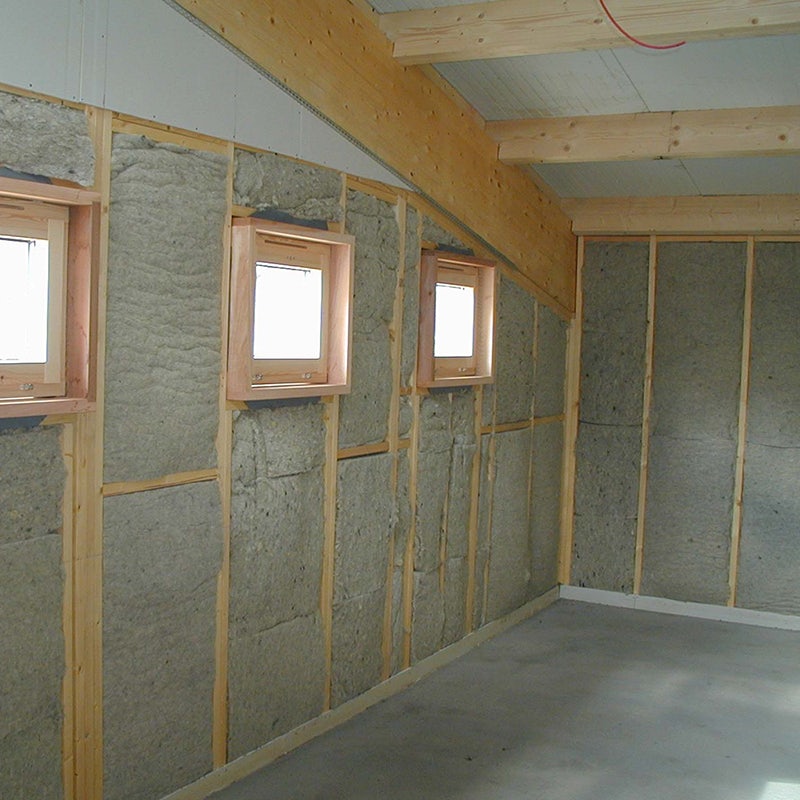
Table of contents:
1. What is a stud wall?
A stud wall, also known as a partition wall, is a wall or partition that is created with a frame, made from timber or metal, that is then covered in appropriately sized plasterboard. It is a non-weight-bearing wall, meaning that it does not support any of the weight of the actual building, but when finished it looks just like a standard wall.
2. Why use a stud wall?
A stud wall is a quick and easy way of dividing a space up to create a more usable space. This can be anything from dividing a large room into two to adding an ensuite to a bedroom or even creating a walk-in wardrobe.
A stud wall can be erected much more quickly than a more traditional brick-and-mortar wall. This means that any plumbing and electricity can be installed earlier on in the building process.
If planning for an extension is rejected, a stud wall is considered to be a cost-effective alternative. If an extra room is required, whether it is due to the family expanding and a new bedroom is required, or a member of the family works from home and requires a study, a stud wall can be used to split a larger room into two.
3. How to build a stud wall
Before installing a stud wall, it is important to check that you won’t be drilling into any electrical cables or pipes – this can be done using an electronic detector if you are unsure. It is also worthwhile to work out where the floor and ceiling joists are – if the wall is running parallel with the joists it should be installed directly above a joist.
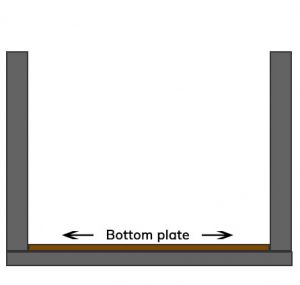
Install the bottom plate
First, determine exactly where the stud wall is going to go. Then measure the length of the floor that the wall will cover, and cut a piece of timber batten to this length. Now nail the timber batten to the floor, where the stud wall will go – if needed, draw a straight line that can act as a guide to ensure the bottom plate is nailed in accurately. Try to ensure that the nails are going into joists wherever possible, to create a secure and stable wall. If you’re planning on fitting a door within the stud wall, only put one nail in the area where the doorway will be located – this piece of bottom plate will be removed later.
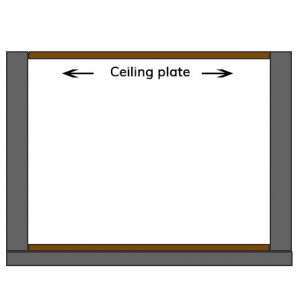
Install the ceiling plate
Next, install the ceiling plate. This needs to be directly above the bottom plate – draw a line up the wall from the edge of the bottom plate, using a spirit level to ensure it is straight and vertical, to mark where the ceiling plate should be. Alternatively, why not use a plumb line to make sure it is directly above and in line with the bottom plate?
Cut the timber batten to length and then nail it into place in the ceiling – this is easiest if there is someone to help hold the batten up whilst nailing it into place.
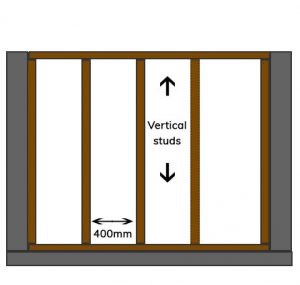
Install vertical studs
First, make sure all the vertical studs are the length of the distance between the bottom and ceiling plates at their individual positions – the distance may vary along the length of the stud wall so the vertical studs may vary slightly in length.
Vertical studs are typically installed 400-450mm apart, so measure between each stud when installing them, using a nail gun to fix them in place. Don’t forget that if you’re installing a door, leave a gap for the doorway.
Install noggins
Noggins act as a support between vertical studs, keeping them an equal distance apart, and secure. Measure the distance between each vertical stud, and cut pieces of timber accordingly, before fixing them between the vertical studs. Try to keep them relatively central, but they can be offset slightly to make nailing them easier.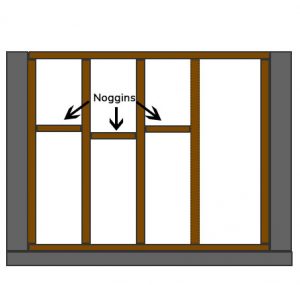
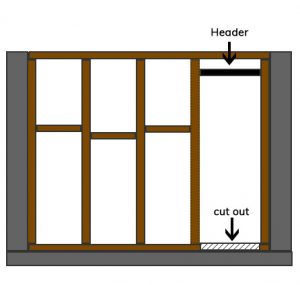
If installing a doorway, measure the doorway and cut out the section of the bottom plate that will be replaced by the doorway. Then, install a header – a noggin that will sit above the doorway. Combine the measurements of the door height, the thickness of the floor, and the width of the door jamb to calculate how high the header should be installed, then nail it into place.
The stud wall frame is now complete.
Next steps
The next step is to fill the gaps between the studs with insulation, to minimise any heat loss. The easiest way to do this is to cover one of the sides of the stud wall with plasterboard, before fitting the insulation from the other side. Then finally add the other side of the plasterboard to the frame and the wall is complete.

The last step is to add the finishing touches – add plaster to the plasterboard, and then opt for paint or wallpaper.

Was this guide useful?
Mentioned in this project guide:


