
Replacing a VELUX window is a task that many homeowners may encounter at some point.
The thing is:
Whether you’re looking to upgrade to a more energy-efficient model, address a damaged window or simply refresh the look of your space, knowing how to replace a VELUX window can save you time and money.
And at Roofing Superstore, we’re here to walk you through the process step by step, making sure your VELUX windows replacement project is a success.
Table of contents:
- Why and when should you replace VELUX windows?
- How much does it cost to replace a VELUX window?
- How to replace a VELUX window step by step
- Final thoughts
Why and when should you replace VELUX windows?
VELUX windows come with a 10-year guarantee, so you should consider replacing yours if you’ve had them for longer.
So, if you’re wondering ‘how long do VELUX windows last’, you now have a general idea!
Having said that:
According to VELUX themselves, around 70% of homeowners will replace their roof windows at some point due to aesthetic or functional reasons.
What’s more:
The design and technology of VELUX windows have improved by leaps and bounds in the last 10 to 20 years, making them better than ever!
So, there’s never been a better time to replace yours.
In addition, there are tell-tale signs your old roof window is no longer suitable for purpose, such as condensation, cracks in the glazing or leaks.
But even if that’s not the case, there are plenty of benefits to VELUX replacement windows.
Let’s take a closer look at them:

Improved energy efficiency
New VELUX windows have improved insulation and are a whopping 115% more energy efficient than old roof windows. So, they’ll keep cold air out and warm air in, creating a more pleasant environment and helping you save money on your energy bills.
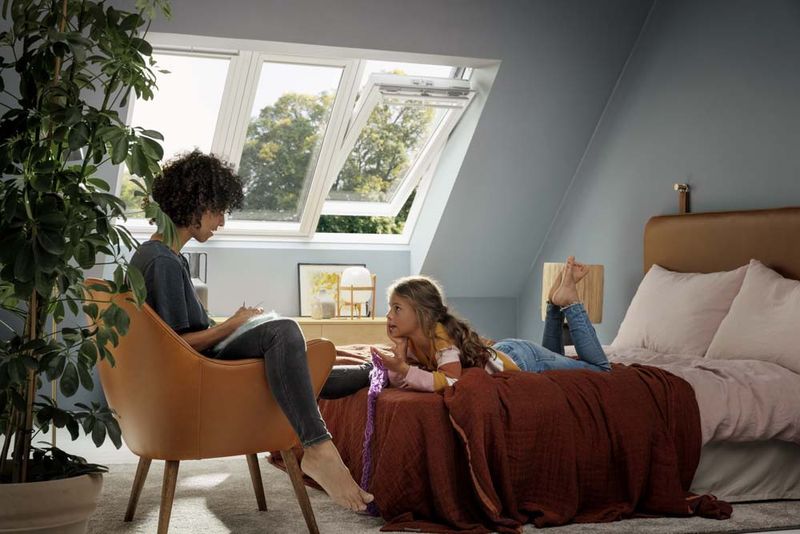
More daylight
Modern VELUX models have slimmer sash profiles and wider glass panes than older models of the same size. So, they let even more natural light in, creating a healthier home for you and your family.
Better ventilation
With a new VELUX window, it’s easy to control the ventilation, which will reduce moisture and improve air quality considerably.
Greater versatility
When looking to buy a new VELUX window, you’ll be amazed at the huge number of choices you have. Whether you’re looking for a top-hung, centre pivot or electric window, one with double triple or noise reduction glazing, there’s something for everyone.
You can even control your window via an app, so you won’t have to worry about leaving it open before going to work!
But what about the price, I hear you wondering.
Let’s find out!
How much does it cost to replace a VELUX window?
The specific cost of replacing VELUX windows will naturally vary depending on the types of windows. Naturally, replacing a big 3in1 window will set you back more than replacing a standard one. You can explore the pricing of the various ranges in our VELUX windows price list.
That being said:
VELUX estimate that the average cost of a standard like-for-like replacement is between £980 and £1,000. This figure includes the new window itself. If you decide to go with a local VELUX Certified Installer, you’ll be charged a fixed installation fee of £500 for the first roof window and £350 for each subsequent window (add an extra £100 for postal codes inside the M25 area).
The entire process to replace window panels actually takes less time than you might think – a like-for-like replacement can be easily done in around four hours. If you want to upgrade to a larger window or you’re replacing several at once, you’re looking at one to two days.
The question is:
Can you replace VELUX windows by yourself? Indeed, you can!
That’s exactly what we’re going to look at next.
How to replace a VELUX window step by step
Once your replacement VELUX window and corresponding VELUX flashing kit have arrived in good order, the first thing you need to know is how to remove your old VELUX window.
Don’t forget to gather your tool! You’ll need the following:
- Tape measure
- Screwdriver
- Pry bar
- Utility knife
- Safety goggles
- Gloves
- Caulking gun
- Exterior-grade silicone sealant
- Insulation foam
Got everything handy? Let’s crack on!
Step 1: Remove the old window
Open the existing VELUX window and remove any blinds. Then, locate the sash release buttons or tabs on the window frame and press them simultaneously to release the sash. Carefully remove the sash from the frame.
Next, use a pry bar or screwdriver to remove any trim or casing around the window frame. This is a crucial step, so take your time and be cautious not to damage the surrounding area. You don’t want to make extra work for yourself!
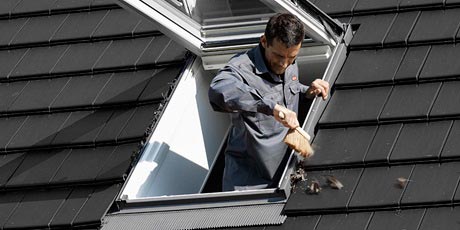
Step 2: Prepare the opening
Inspect the opening for any signs of damage or decay. Replace or repair any deteriorated wood or insulation as necessary. Ensure that the opening is clean and free from debris before proceeding. Then, remove the surrounding roof tiles.
Step 3: Install the new VELUX window
Position the new VELUX window into the opening, ensuring it is centred and level.
When installing VELUX windows, always follow the VELUX fitting instructions for your specific model, as the specific method may vary.
Typically, you’ll need to secure the window frame using the screws provided with the window and install the flashing. Be sure to attach the screws at designated points on the window frame.
For more information, check out our in-depth VELUX window fitting guide.
Step 4: Insulate and seal the window
To enhance energy efficiency and prevent water infiltration, apply insulation foam around the edges of the window frame. Fill any gaps between the window and the opening, ensuring a snug fit. Once the foam has dried, trim away any excess with your utility knife.
Finally, apply a bead of exterior-grade silicone sealant around the exterior perimeter of the window frame to provide an additional layer of protection.

Step 5: Reinstall the trim and finishing
Reattach the trim or casing that was removed earlier, ensuring a tight and secure fit. Use a screwdriver to reattach any screws or nails removed during the disassembly process. Take care to align the trim properly, maintaining a clean and professional appearance.
Don’t forget to replace the roof tiles you removed earlier!
Step 6: Add the sash, test and clean
Carefully attach the sash to the window frame. This bit is quite easy, as all you need to do is put the brackets into their channels and slot the sash into place.
Now:
Once the window is securely in place and the trim is reinstalled, test the operation of the new window. Open and close it to ensure smooth functionality. Inspect the window from the interior and exterior to confirm no visible gaps or leaks.
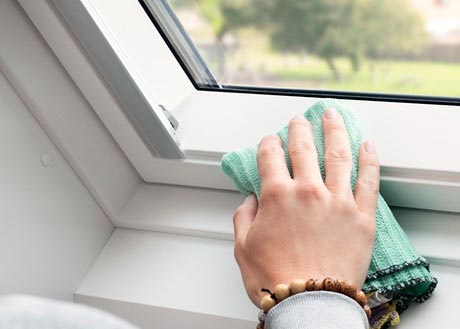
Clean the window and surrounding area using appropriate cleaning agents and tools.
That’s a job well done – you can now enjoy your brand-new replacement VELUX window and its amazing benefits!
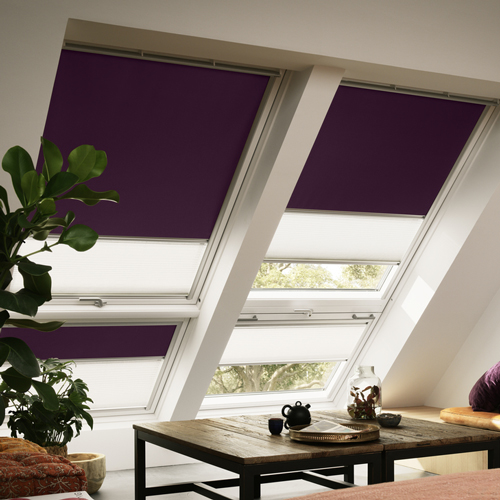
As the cherry on top, we recommend fitting an appropriate VELUX blind. And as you’d expect, we also have a guide on that.
Final thoughts
VELUX replacement windows are a great way to improve your home’s energy efficiency while introducing more natural light and fresh air to create a healthy environment.
This makes them a smart investment that you’re going to benefit from for many years to come.
And now that you know how to replace a VELUX window, you can even do it all by yourself and save as much as £500!


