
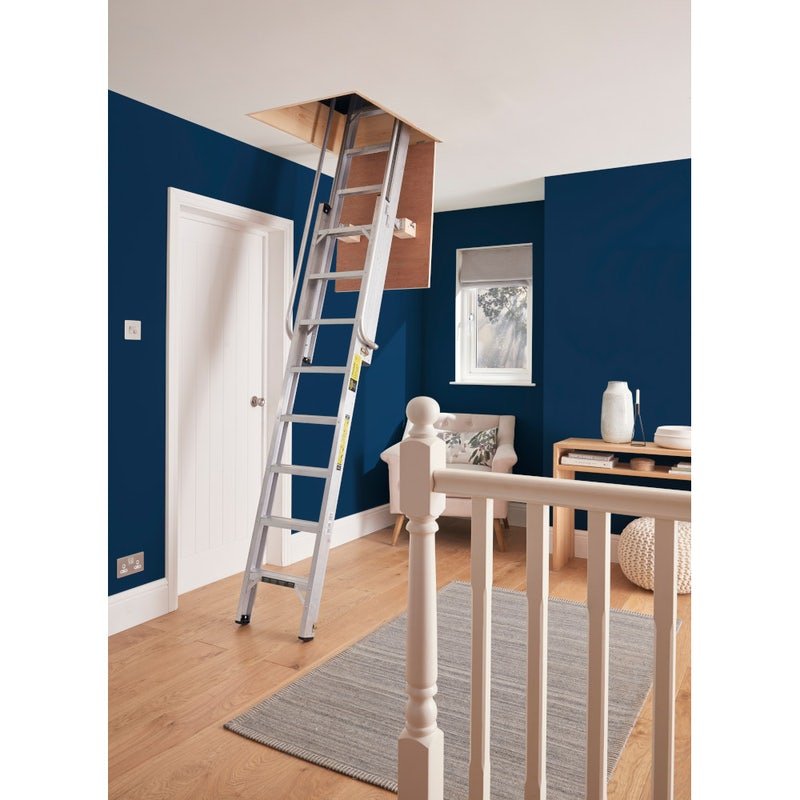
Loft ladders are a fantastic way to access your attic space. In fact, for many properties, they are an essential feature. It saves you from buying a separate ladder you would have to store in places like the shed or garage. Instead, you can collapse and sit the ladder right in the space.
So, how do you fit a loft ladder? Let’s help you with that! We have created a comprehensive guide to help make the installation process easier for you.
As you’ll see, we’ve included all the major brands, so from Youngman to FAKRO, Manthorpe and Werner, we’ve got you covered. Read on to find out more.
Table of contents
- How to install a loft ladder
- How to install a Youngman telescopic loft ladder
- How to install a FAKRO loft ladder
- How to install a Manthorpe Loft ladder (GLL256 and GLL257)
- How to install a Werner loft ladder
- Where to buy loft ladders
How to install a loft ladder
Before you fit your loft ladder, you are going to need the following tools:
- A loft ladder
- Screwdriver (manual or electric)
- Screws
Now onto the fitting!
Step one: Position the ladder square to the ceiling
Ensure the ladder opens the correct way and position it square to the ceiling. This guarantees the battens nailed to the sides support the ladder.
Tip: Ask someone to help you check the box frame is flush with the ceiling around the opening. Adjust it as necessary to make it level if not.
Note: Some older ceilings might not allow you to make the box frame completely flush. This is because of the shape. So, try to make the ladder fit as flush as possible. Then place a spirit level onto one of the ladder treads to check the alignment.
Step two: Fit the box frame permanently into the opening
Add the box frame to hold the ladder and hide it in place. There are two ways to fix the box in place:
Method one: Drill holes on both ends and sides of the box frame. Two holes on the widths (shorter side) of the box and three holes on each of the lengths (longer sides) of the box. They secure the box in place using steel or brass woodscrews.
Note: Take care not to push or pull the box frame out of place when fitting the screws upwards. This can cause problems with the way the hatch lid closes. It can also cause problems with the way the ladder extends and sits when fully extended.
Method two: Nail the box to the ceiling joists with a hammer and nails.
Step three: (Timber ladders) Cut the ladder to the required height
If your wooden loft ladder is too long, you can cut it to the desired size. To do this, pull the ladder down as normal, but instead of letting it stand straight, tuck the last folding section backwards. Sit this section on a suitable surface for cutting.
Use a tape measure to find the distance between the bottom of the previous section of the ladder and the floor. This will help you find the required length needed. Once you have that measurement, mark it along the length of the backwards folded section of the ladder. You can now cut this section down to size.
If you have done this correctly, your loft ladder should touch the floor when the hatch and struts are fully extended. Some loft ladder kits provide plastic feet for the end of the ladder. So, these should allow the ladder to sit squarely with the floor when fitted.
If the loft ladder kit has not provided feet, you can cut the ends of each ladder length at the bottom of the ladder to an angle. To do this you will need to use a sliding bevel. That way the ladder can sit as needed without plastic feet.
Step four: Finish installing the loft ladder
This final task will do wonders for the appearance of the ladder. Using a mitred architrave, put this around the edge of the box and frame. Then fix it using panel pins (glueing corners if needed). Hammer down any nail heads you see, ensuring they are flush with or below the trim’s surface.
You can now use a coloured filler matching the timber. This will ensure the staining and polishing on the surface do not stand out.

How to install a Youngman Telescopic Loft Ladder
If you’ve purchased a Youngman telescopic loft ladder, here is how to install it!
First things first, know what the Youngman telescopic loft ladder kit includes. You can review the standard parts that come with a telescopic loft ladder by Youngman in the table and diagram below. Discover what you need to ensure you have everything to hand when installing your loft ladder.
| Part number | Components |
| 1 | Ladder |
| 2 | Mounting brackets (x2) |
| 3 | Swivel arms (x2) |
| 4 | Hinge swivel pins (x2) |
| 5 | Ladder sub-frame carrier bar (x1) |
| 6 | Ladder sub-frame carrier tubes (x2) |
| 7 | Springs (x2) |
| 8 | Telescopic pole with hook (x1) |
| 9 | Bracket fixing screws (x8) |
| 10 | Instructions |

Now you know what you need, onto the fitting!
Step one: Take the floor-to-ceiling measurements
This will help determine the required ladder change when fitting the ladder.
Step two: Mark a vertical centre line on the ceiling joist
Make sure you mark a vertical line on the ceiling joist on the side of the loft hatch. This is where you will attach the hatch hinges. From this centre line, mark 188mm on each side, creating vertical lines of 90mm or longer along each mark. These lines are the mounting brackets’ centre lines; the places where you will fix the mounting brackets.
Step three: Place the mounting bracket over the corresponding bracket centre line
Ensure the low screw hole is covering the line. Mark this hole, and the two top screw holes. Repeat this for the second mounting bracket.
Step four: Fit the brackets
Drill 4mm diameter holes at each mark then screw the mounting brackets into place.
Step five: Fit the swivel arms
Place one swivel arm within the mounting bracket, making sure to align the holes. Push the swivel pin through the arm and bracket holes. Repeat this with the other mounting bracket and swivel arm.
Please note: There is a specific left and right swivel arm, so it is important to pair the correct components.
Step six: Take the sub-frame carrier bar, springs, and the sub-frame carrier tubes
Slide the carrier bar into the hole of one of the carrier tubes and slide the two springs onto the bar. Then slide the other end of the carrier bar into the other sub-carrier tube hole.
Step seven: Adjust the springs and swivel pins
Find the grooves near each end of the bar and rest each spring in a groove. Then lay the hinged swivel pins back vertically and pull the free end of each spring towards the anchor point in the pins. They should simply click in.
Step eight: Pull the sub-frame carrier bar down until it touches its stop
The tensioned springs you fitted will hold this in position.
Step nine: Extend the ladder now if needed
You can extend the ladder 15cm or 30cm longer than its regular length. This will depend on your floor-to-ceiling height. If needed, extend the ladder now.
Step ten: Finalise the installation
Remove the bolts from the endcaps on the end of the ladder. Move the ladder up to the top of the swivel arms and align the holes in the swivel arms with the holes at the top of the ladder ends. Insert and tighten the bolts, then use an Allen key to tightly secure them.
Please note: It is important to ensure the location pins engage with each groove in the endcaps. This will guarantee complete stability.
How to install a FAKRO Loft Ladder
Homeowners and professional fitters can benefit from fitting a FAKRO loft ladder. So how do you install one?
Tip: Watch the video below these steps for further clarity.
Step one: Unpack the ladder
Remove the attachments and protective parts/wires holding it together. These can be disposed of.
Step two: Attach thin timber lengths to shorter ends of the ladder frame
Using some rope and timber, temporarily attach timber around the short ends of the frame so that it hangs from the timber. After doing this, attach the springs.
Step three: Hang the ladder in the holder from the frame of the attic
This will enable you to attach the ladder with the box to the frame for the attic opening. Place wedges beneath the timber lengths and use a spirit level to make sure it is flush with the opening to the attic.
Step four: Screw the ladder in place
Place the ladder in the position you want the ladder to open. Place small sections of timber board behind the frame and screw the ladder’s box frame in place.
Once the frame is secure, you can now remove the timber hanging the rope in place from the timber.
(Optional): Before securing the frame in place, add mineral wool insulation around the frame to prevent drafts. Screw through the piece of board, insulation, and frame to secure it in place.
Step five: Caulk around the frame
Apply caulk to fill the spaces. This will further minimise drafting and make for a neater appearance.
Step six: Cut the ladder to length
You will likely need to adjust your new wooden ladder. As such, find a suitable cutting surface and place the bottom section of the ladder onto that surface.
Then use a tape measure to find the distance from the bottom of the second section to the floor. This will help you identify how much you need to cut off from the ladder.
Now mark the amount you need to cut off from the ladder. Cut using a saw and sand down. Add the rubber foot stops to avoid the ladder scratching the flooring.
Test that the ladder can now fully unfold and adjust accordingly. Before you use it, you must make sure the ladder is extended to create a fully straight line with the flat part of the feet touching the floor. If not, tighten the nuts at the top of the ladder until this is so.
Once you have sorted the ladder, there it is! A newly installed FAKRO LWF ladder. For visual support, check out the instructional video below.
How to install a Manthorpe Loft Ladder (GLL256 and GLL257)
Fitting instructions for these types of ladders can be found in Manthorpe’s instruction manual. Here we’ve broken it down into simple steps to help make the process easier for you. We’ve also broken down the instructions for the GLL256 and GLL257 loft ladder fittings so that you can see the differences when it comes to installing the two models.
Step one: (If needed) Hang the trap door
If a trapdoor is already in place, move forward to the next step. However, if you need a new trapdoor, please follow this step accordingly.
First, make sure the new trapdoor’s thickness does not exceed 20mm (¾ of an inch). You will also need to make sure the weight isn’t excessive, and the hinge screws are secure. Chipboard and MDF (Medium Density Fibreboard) material may not be a suitable choice in these instances.
You can use the existing cover as a template for the new piece. Make sure that as you cut the new piece out, there is a slightly loose fit around each edge of the cove, around 3mm (⅛ of an inch maximum).
Remove the original trapdoor and its hinges. Then remove any support battens from the four faces of the loft trap. This should make the faces of the frame flat. Any left screw holes can be filled with wood glue for better performance.
Fix your hinges on the same end as where you intend to place the ladder. Make sure there is a minimum of 26mm (one inch) of clearance between the top face of the trapdoor and the top edge of the framework.
Step two: Fit the twist catch
Using a tape measure, find the middle point of the edge of the trapdoor on the opposite of the hinged side. Mark the centre line with a pencil. Then close the trapdoor fully and measure exactly 26mm (one inch) in from the edge of the frame. Mark this with a pencil.
Now using your drill, create a 13mm ( ½ an inch) hole in the centre. Sand it to smooth out any rough edges.
You can now pass the catch operator through the trap door hole. Do this from the underside position. Make sure the pointer is pointing upwards towards the trapdoor edge. Then place the travel stop ring over the operator. Ensure the securing tag is at 45 degrees to the trapdoor centre line.
Now fit the catch leaver over the operator. Locate it into the operator. Make sure the lever points towards the trapdoor edge and fully sits within the travel stop ring.
Using a screw, secure the travel stop ring in place and, finally, secure a catch assembly with an M12 nut. Tighten the nut sufficiently, ensuring it can rotate freely without looseness.
Step three: Fit the location bracket
You use this to hold the trapdoor shut. You’ll first have to measure the thickness of the trap door. Add 9mm (⅜ of an inch) to this measurement.
Now close the hatch door and draw a line, using the measurement, up from the bottom edge. Make sure this is parallel with the opening.
Now open the hatch door and draw a vertical line on the inside of the trapdoor frame. Ensure that it corresponds with the centre line of the trapdoor catch.
You can now place the location bracket along the horizontal line. Make sure the indent mark on the bracket matches the vertical centre line.
Using a bradawl, insert two 20mm wood screws through the guide holes of the bracket. Your bracket should now be securely in place.
Step four: Assemble the ladder and the fittings
Please note: The ladder’s long sides are known as ‘stiles’. The complete sections of the ladder are known as ‘frames’. Using this, you can identify the front ‘frame’ of the ladder via the rounded feet.
Take care when pushing the studs out of the ladder. If needed, tap them lightly with a hammer. Then remove the plastic end tips from the bottom of the rear frame of the ladder. Make sure to note which way round they must go back on.
Take your hinge guides and slide these onto the rear frame stiles. You must position the brackets outwards, ensuring the double-holed half is uppermost. Slide them up to the factory-fitted permanent top stops. Do not put the plastic end tips back on yet.
Step five: Add the additional top stops (if needed)
This will depend on the floor-to-loft height. If you do need these, place the top stops over the holes at the rear frame of the ladder. Ensure they are around 150mm (six inches) below the permanent top stops.
You must have the hinge guides already sitting below the extra top stops before fitting. If so, you can fix the extra top stops using two M4 bolts and nuts.
Step six: Fit the bottom stops
As in step four, the end tips should have been removed from the rear frame. Now, before putting them back, you will need to slide the bottom stops onto the rear frame stiles.
Position these bottom stops as indicated and fix them with screws. You can now place the plastic end tips back onto the rear frame and secure them with studs.
Step seven: Install your ladder
Please note: Where you fit the hinges, install the ladder on that same side of the trap.
So, now’s the time to fit the ladder. Open the trapdoor and place the ladder centred in the opening. Find the hinge guide bracket arms on the top edge of the loft hatch frame.
Using a bradawl, create guide holes by pre-drilling pilot holes (around 2mm diameter) for all screws. Then use 35mm screws to fix it in place.
Please note: The bracket arms with two screw holes should be on top. If the flooring material covers the top edge of the loft hatch frame, you must make sure it is completely stable. If necessary, use longer screws to penetrate the frame.
Your ladder should now be able to swing from the hinges and slide freely up and down the guides.
Step eight: Fit the stowing ‘V’ rod
Bring down the ladder so that it is fully open. Then remove the studs from the top tips of the ladder’s rear frame.
Place the ends of the ‘V’ rod through the holes in the tips/stiles. Now lower the ‘V’ rod to the loft floor. Make sure this lines up with the centre of the ladder.
Place the fixing bracket over the stowing ‘V’ rod. Screw this to the floor with four screws.
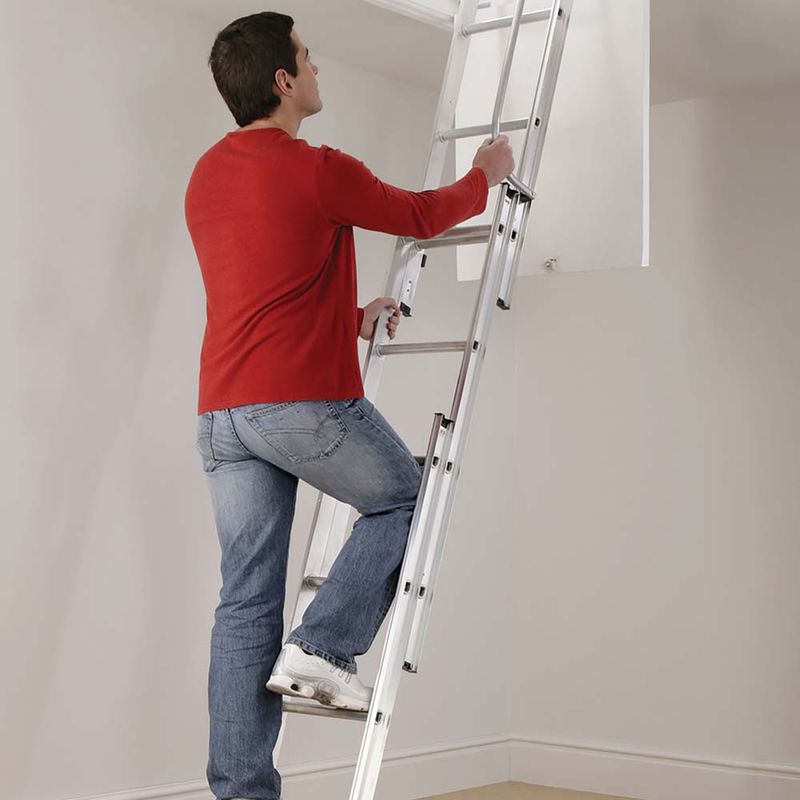
How to install a Werner Loft Ladder
Werner has dedicated loft ladder fitting instruction videos for each of their loft ladders. Here we’ve broken them down into simple steps to help make the process easier for you.
How to install a Werner 3 Section Aluminium Loft Ladder
Note: You can also use these steps to fit a Werner 2 Section loft ladder. However, always check the manufacturer’s instructions before doing so and during the fitting.
Now, you will most likely have a kit at hand with most of the items you need for the fitting. However, you will have to get other tools and parts as the kit does not include them all. So, here is what you will need to make sure you have before fitting your loft ladder:
Included:
- Loft ladder kit
Not included:
- Trapdoor
- Screwdriver (manual and/or electric)
- Tape measure
- Ruler
- Pencil
- Wrench
Onto the fitting!
Step one: Fit the trapdoor
You will need to get this separately. Once you have measured and cut a door to a suitable size, you can screw on the hinges provided to the shorter sides of the door.
Then fit the trap door to the bottom edge of the opening. This should create a flush appearance with the ceiling when closed. Make sure to test the opening and closing of the door.
Step two: Find the centre of the short side of the trapdoor closest to the floor when opened
Using your tape measure, measure the short side of the trap door. Then measure from the opening’s inner edge to the line marked to create a cross.
You will use this to fit a twist catch. This twist catch is what will open the trap door. As such, make sure you leave enough space, so it does not catch on the edge of the opening and prevent the trap door from being brought down.
Step three: Fit the twist catch
Once you have identified the centre and found a suitable space for the twist catch, drill a hole about 13mm (half an inch) at the cross section. Clear off any debris and slot through the catch operator so the long part is facing into the attic.
Once you have put it through, add the rest of the parts in this order as follows:
- Travel stop ring with the hoop facing upwards.
- Catch level with the long part facing downwards.
- M12 nut screwed on and tightened using a wrench.
Once all those parts have been fitted, screw this feature in place.
Step four: Fit the location bracket onto the opening
Find the middle line of the bracket and place this at a suitable distance away from the edge of the opening. Once you have done that, screw it in place.
This is what will be used to catch the door when it is closed using the twist catch. So, make sure to test and measure the distances accurately.
Step five: Measure the distance from the floor to the loft floor
You will use this to make sure the loft ladder is a suitable height. If the height is correct, then you can move forward with the rest of the ladder fitting.
Step six: Fit the ladder hinge guides and ladder stops
In the kit, you will find hinge guides. You can identify these by the wheel mechanisms. First, remove the coverings from the bottom of the ladder. Now slot these guides onto the section of the ladder that will sit on the attic floor. The hinge should be facing upwards at this point.
Once you have slotted these on, put on the stops. These will prevent the ladder from slamming against the attic when closed. Make sure they are level with the bottom connections of the ladder and screw them in accordingly.
You can now place the coverings back onto the bottom of the ladder.
Step seven: Secure the loft ladder to the floor of the loft
Lay your loft ladder in its folded structure onto the loft floor at the trapdoor side of the opening. The hinges should be facing down onto the short edge of the opening at this point.
Screw these hinges in place using the holes provided onto the trapdoor and floor.
Step eight: Open the ladder and fit the stowing ‘V’ rod
Carefully set the ladder down in the open position and go to the top. Take the stowing rod and put each section into the holes provided at the top of the ladder legs. Place the stops provided to stop the rods from sliding out of the holes.
You can now screw the rod in place on the floor of the loft at its connection point.
Step nine: Prepare the stowing pole
You will use this to access the loft ladder. First, take the pole and fit the covering on the bottom of the pole. Then take the hook that will pull the door/ladder down and attach it accordingly. You can screw this in place to ensure it doesn’t fall off.
All that’s left is to test the ladder! As always, look to the instructions provided to ensure you do not fit the ladder incorrectly.
You can also view the videos below for a visual idea of how to fit your Werner loft ladder.
As with any ladder fitting, read the instructions that come with the ladder to ensure you do not fit it incorrectly.
Where to buy loft ladders
If you want a different type of loft ladder, look no further than our Roofing Superstore! We have many ladders for you to choose from, including more by Youngman, Manthorpe loft ladders and Werner and FAKRO loft ladders.
You can also brush up on your knowledge with our loft ladder buyer’s guide. That way you can find out crucial information to help you make a more informed decision.
Was this guide useful?
Mentioned in this project guide:


