
Coping stones are a great way to finalise a wall. You can find steps for how to lay coping stones below.
Table of contents
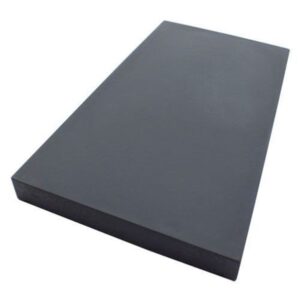
What is a coping stone?
Coping stones are a specific type of wall stone. They are usually used to form part of a coping and can be curved, sloped or flat. They are also almost always found at the top of wall construction.
What is the purpose of coping stones?
The main reason is to allow water to run off of them when it rains. They act as a ‘cap’, protecting the face of the wall from getting wet and are often slightly angled to direct water away. Over time, water damage on walls can cause problems like mould, rot, and decay. This could potentially lead to the wall collapsing, so coping stones are excellent if you want to preserve your brickwork.
If safety is a concern, coping is a great option. The tops of walls can sometimes have very harsh, rough, or sharp edges. If you are working on a project that has to meet specific safety requirements, curved, half round, or bullnose coping may be the best option. You can also choose your coping stones based on aesthetics. Match smooth finishes with modern architecture or riven and textured coping to more traditional and rustic building features.
You can find out more about coping stones via our ‘Coping stone buyer’s guide’ for further information.
How to lay coping stones
The most effective way how to lay coping stones is by using a coping stone adhesive. Coping stone cement (or mortar) is also an option.
Before the coping stone laying process, you will need to confirm whether your freestanding/garden wall is safe. You can be guided during this process via this checklist.
You will also need to consider the width of the wall and allow for render when ordering the coping stones.
What you will need
- Coping stones
- Coping stone cement (mortar) or coping stone adhesive
- String
- Spirit level
- Rubber mallet
- Tape measure
Steps for how to fit coping stones
These are steps for applying coping stones to a straight wall with no corners. For example, a standard garden brick or stone wall.
Step one: Place one coping stone on either end of the wall first. Using a string line, set this on the highest edge of the coping and run it along to the opposite end. This can help ensure each coping stone is lined up with its neighbouring stones as you lay each one down.
Note: You do not need to set the string line on both sides of the coping.
Step two: Use a spirit level to ensure the coping is levelled as accurately as possible. Once confirmed, secure each coping stone to the wall below with wet mortar mix or adhesive, making sure it is placed in the centre with an equal overhang on either side. Use a trowel to help spread the joining material, then use a rubber mallet to confirm the level.
Step three: Next, secure the rest of the coping stones to the wall, starting from one end and finishing at the other. Taping the joints is recommended to minimise future staining as you do so. Make sure the coping stones are level as you lay each one, following the processes mentioned in step three and ensuring there is no run, up or downhill.
Note: All joints should have a difference no bigger than 10mm and you may need to cut a coping stone with an electric grinder to fit into the centre if needed.
How to lay coping stones on a curved wall
When laying coping stones on a curved wall, there are similar steps to fitting coping stones as above. However, with a curved wall, you are going to need to match the stones with the radius of the wall you’re working on. Here’s what you can do!
Step one: Do this, two coping stones at a time. As with a straight wall, lay the front of the coping so that they are parallel with the front of the wall – do not secure in place just yet. If this has been done correctly, there should be a gap between the coping.
Step two: Take a ruler and measure the gap between the two coping stones. Then take this measurement and divide it by two. Mark that final measurement on the back end of the coping stone on top of the coping.
Step three: Now draw two separate lines from those markings down to the front corners next to the gap of each coping. This will give you the lines to follow for smooth cutting.
Note: Not all coping stones will need to be cut. Make sure to test your coping placement before securing or cutting.
Now that you’ve successfully laid your coping stones, make sure you know how to clean and maintain them properly.
How much should a coping stone overhang?
An easy way to figure out how to centre your coping and ensure a suitable overhang is by using the following equation:
Width of coping – width of the wall – width of render ÷ 2
Find the overhang and, using a tape measure, position the coping to the overhang measurement away from the wall at all four corner points. Repeat at the opposite end.

Was this guide useful?
Mentioned in this project guide:


